WordPress Manager
WordPress Manager is a powerful tool integrated into OpenPanel, enabling you to easily install and manage WordPress websites directly from your hosting panel.
Key Features:
Manage WordPress sites
Using the manager, you can modify WordPress settings without the need to log in to the actual website. This feature is especially handy for managing multiple websites, as you can efficiently manage options in bulk, create backups, update plugins, enable automatic WordPress core updates, enable debugging, and much more—all from the OpenPanel interface.
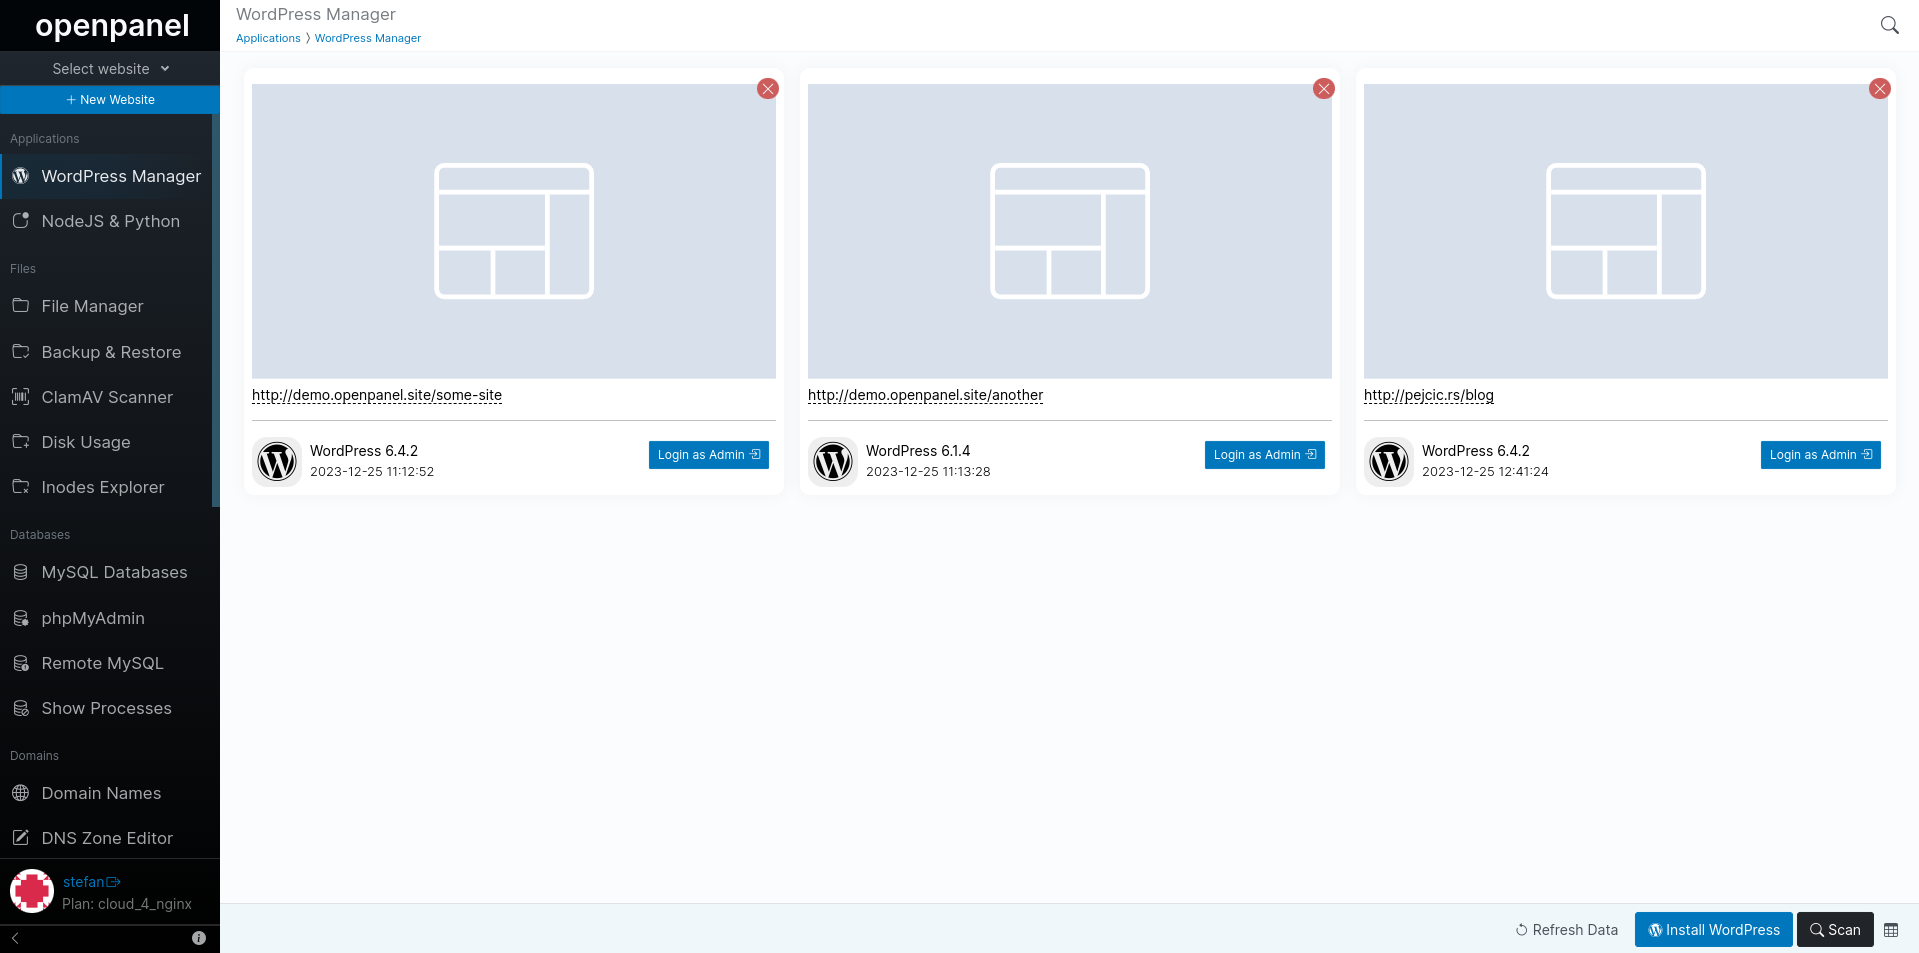
WP Manager overview
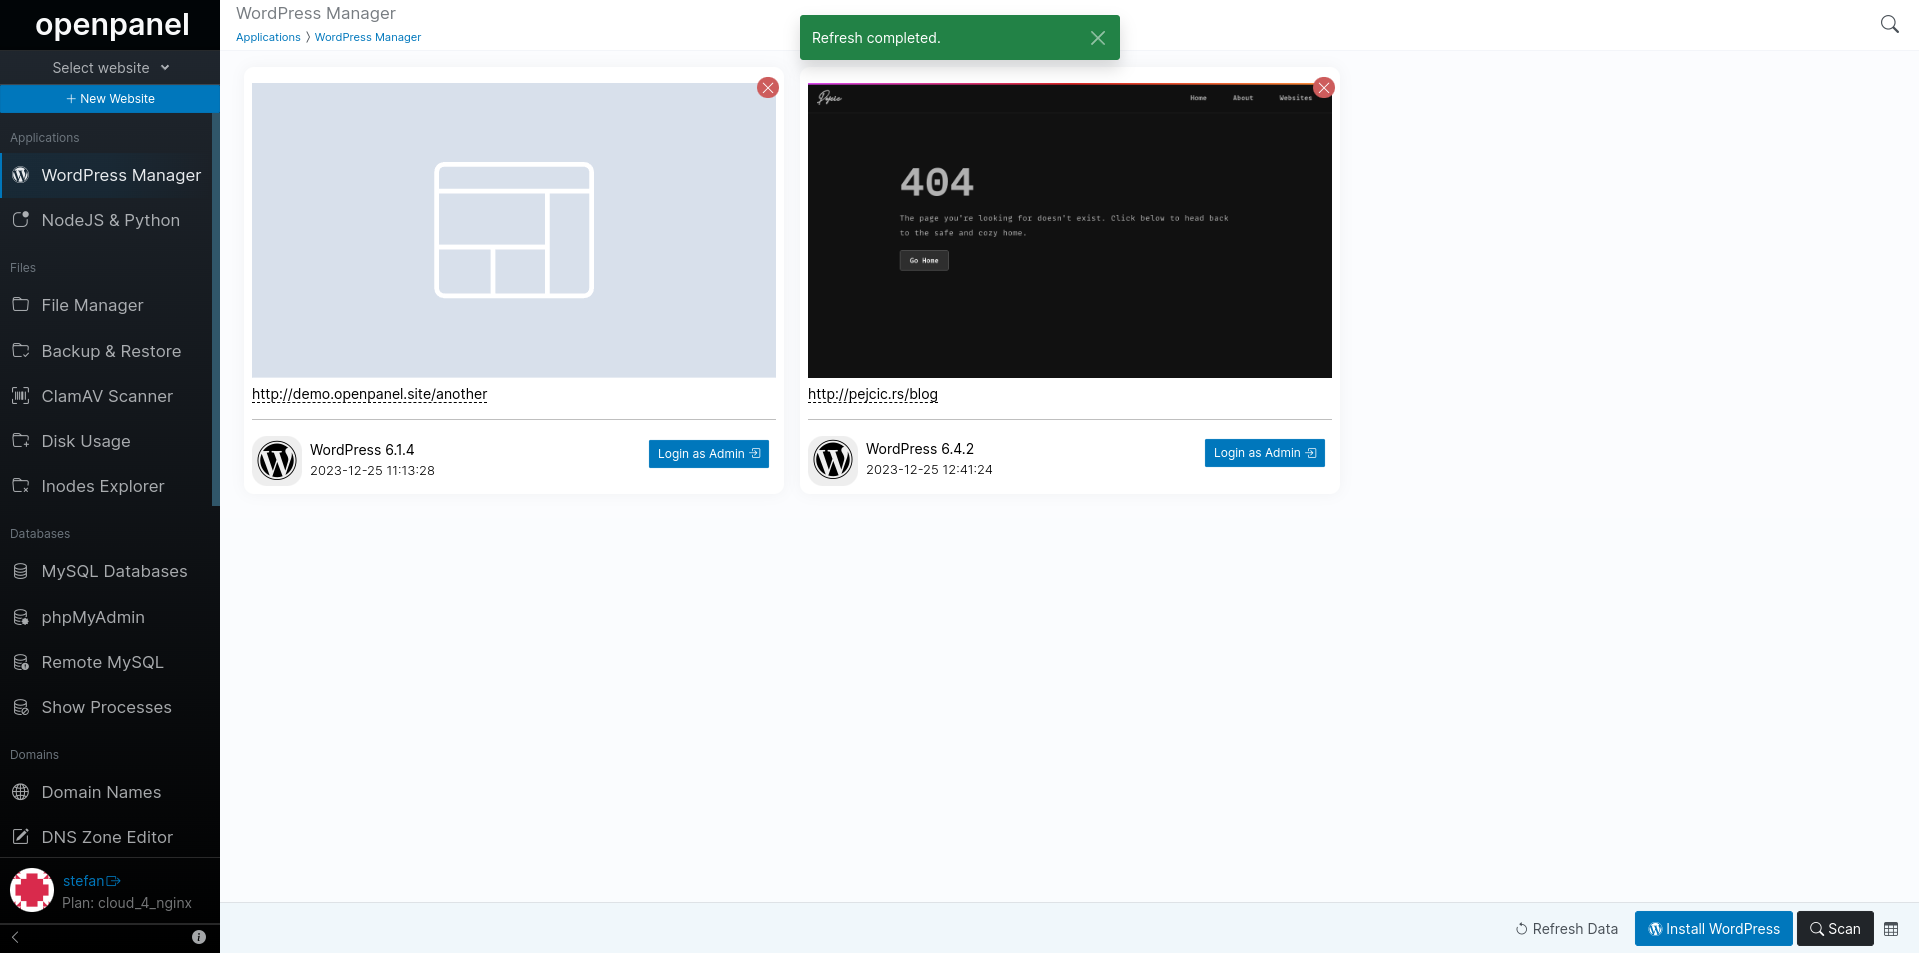
On the main WP Manager page you can:
- view installations: domain name, WordPress version, date when site was installed with or added to WP Manager interface and admin email.
- refresh the data: in case you have changed the domain name, updated WordPress manually or changed admin email address.
- install WordPress: install WordPress on a new domain.
- run a scan: scan for WordPress installations that were manually added on the hosting plan and are not yet visible in the WP Manager interface.
- change view: change the display from grid (default) to table.
Install WordPress
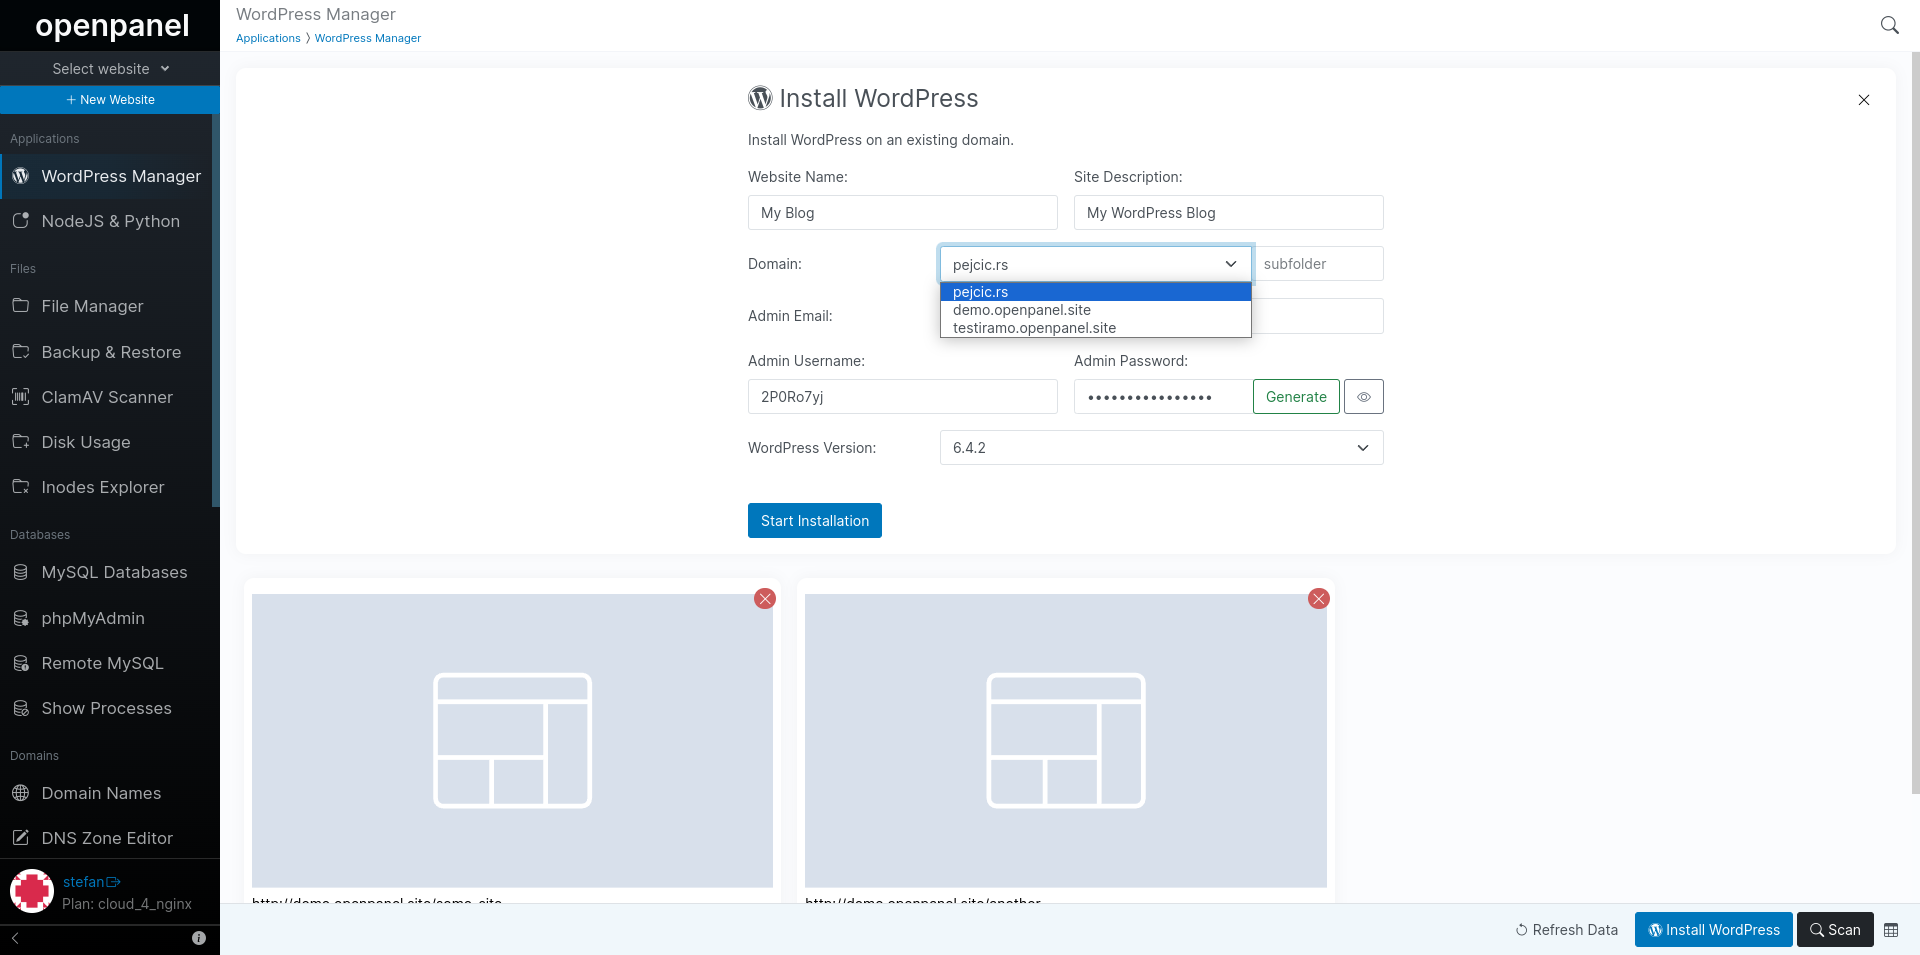
You can quickly install any of the latest 10 WordPress versions with just a few clicks. Each WordPress installation is sourced directly from wp.org, and OpenPanel handles all additional steps, including creating a MySQL database and user, connecting it with the files, configuring the domain based on your choice of Nginx or Apache WebServer, and setting up WordPress.
To install WordPress you need to first add a domain name.
After adding a domain name, click on the 'New Website' button in the sidebar and on popup click on WordPress
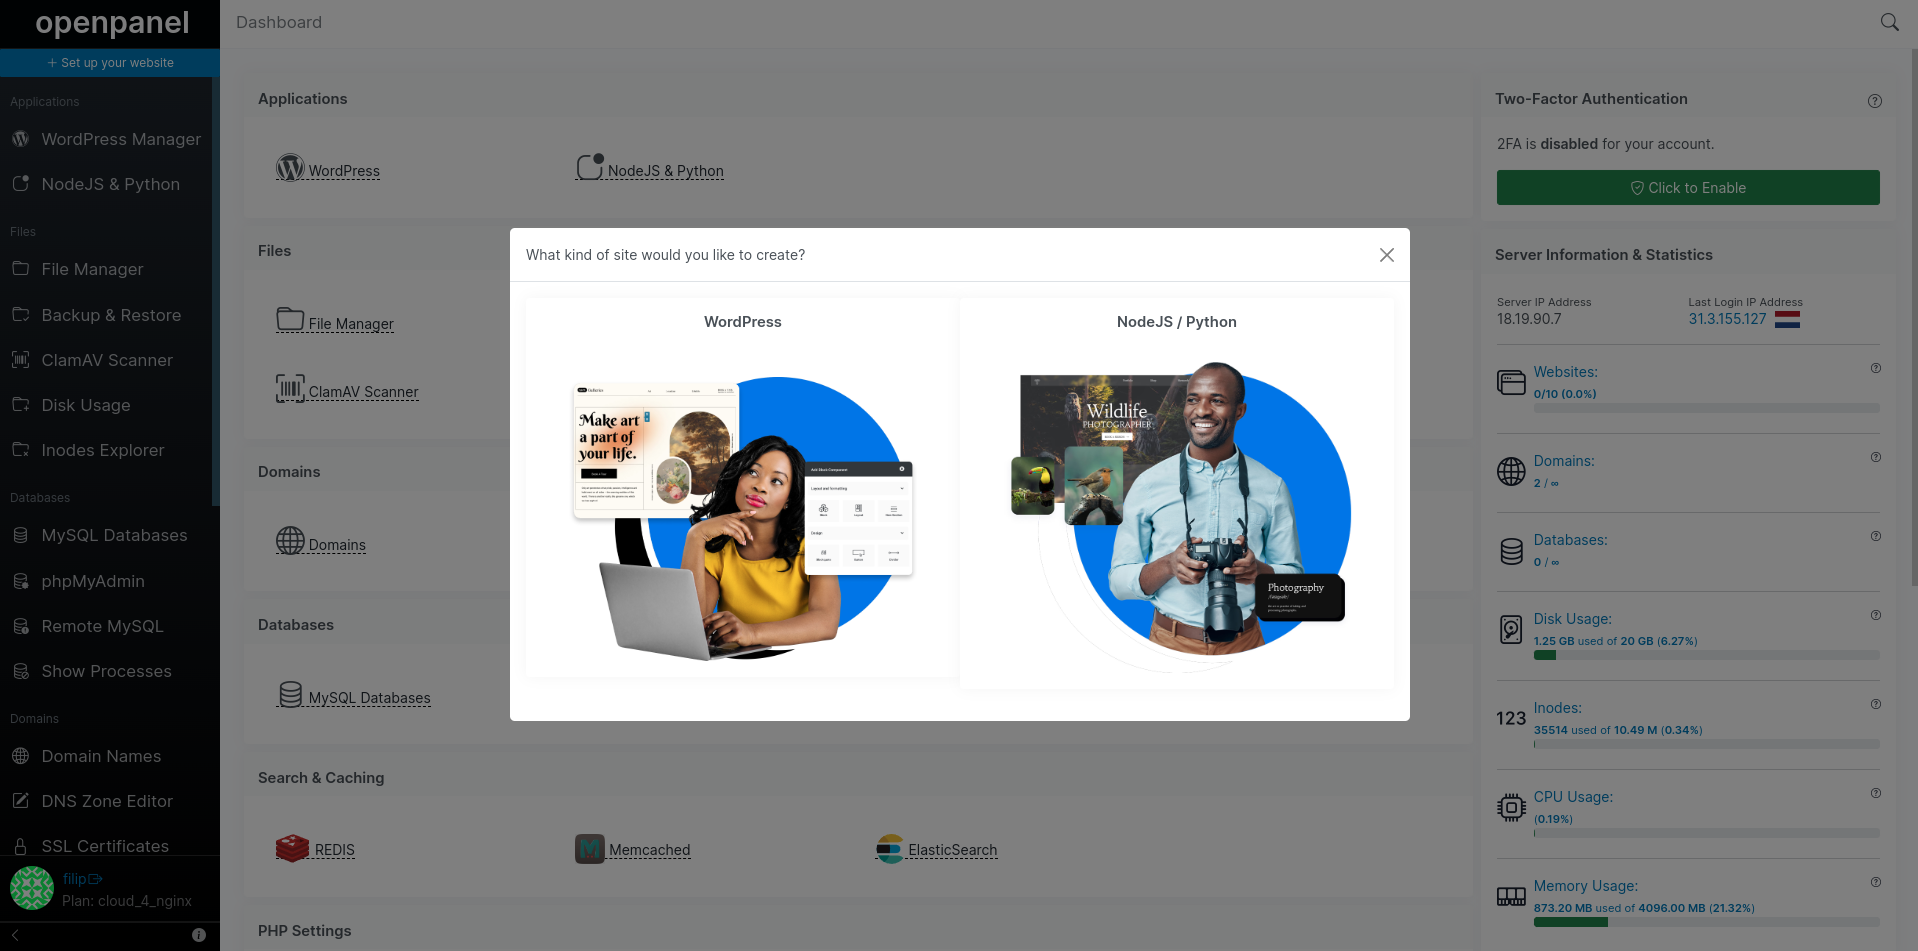
Same page can be accessed by navigating to WordPress Manager and clicking on the Install button.
In the install form set:
- Website name
- Site description (optional)
- Domain name (optionally a subfolder)
- Admin username
- Admin password
- WordPress version
and click on the 'Start Installation' button.
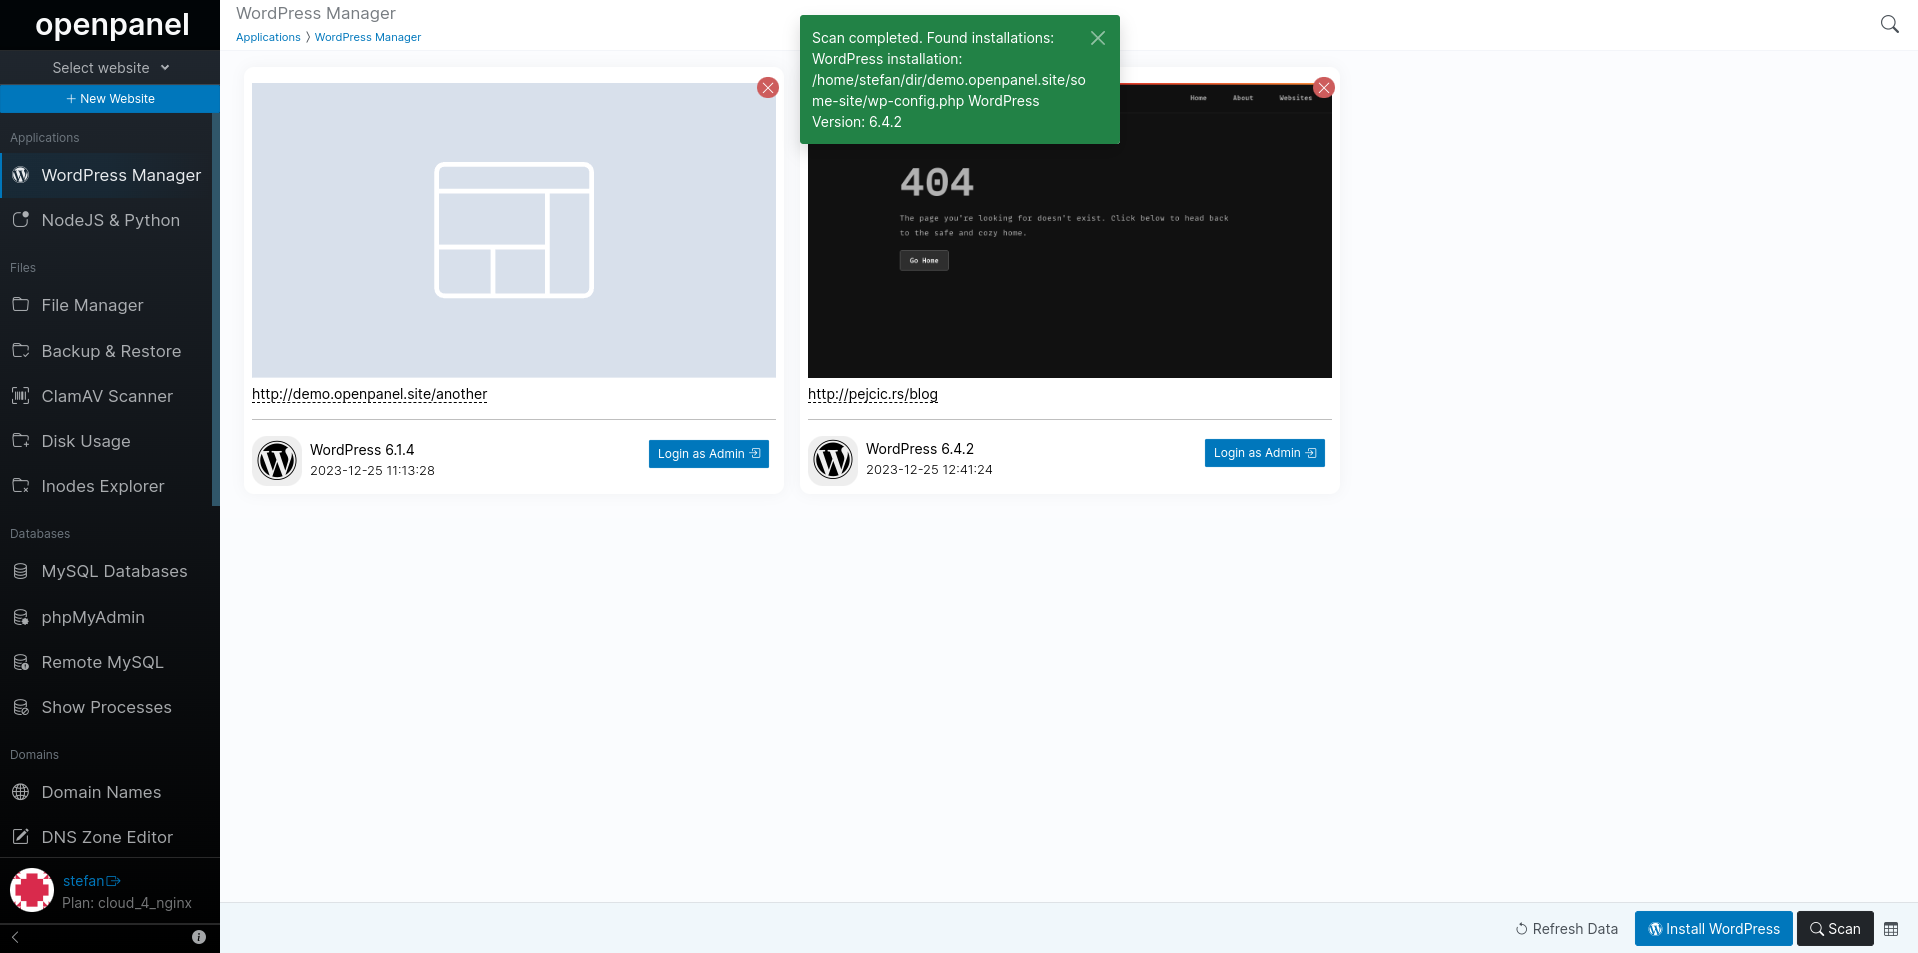
Scan (Import) Installations
By performing a scan you can import existing WordPress installations into the WP Manager interface. The tool will search all your files for wp-config.php (main WordPress configuration file) and import all websites that it finds.
Refresh existing data
In cases when you manually updated WordPress core or changed the admin email address outside the WP Manager interface, the tool will display out-of-date information. To update the data inside the WP Manager database for your websites simply click on the 'Refresh data' button.
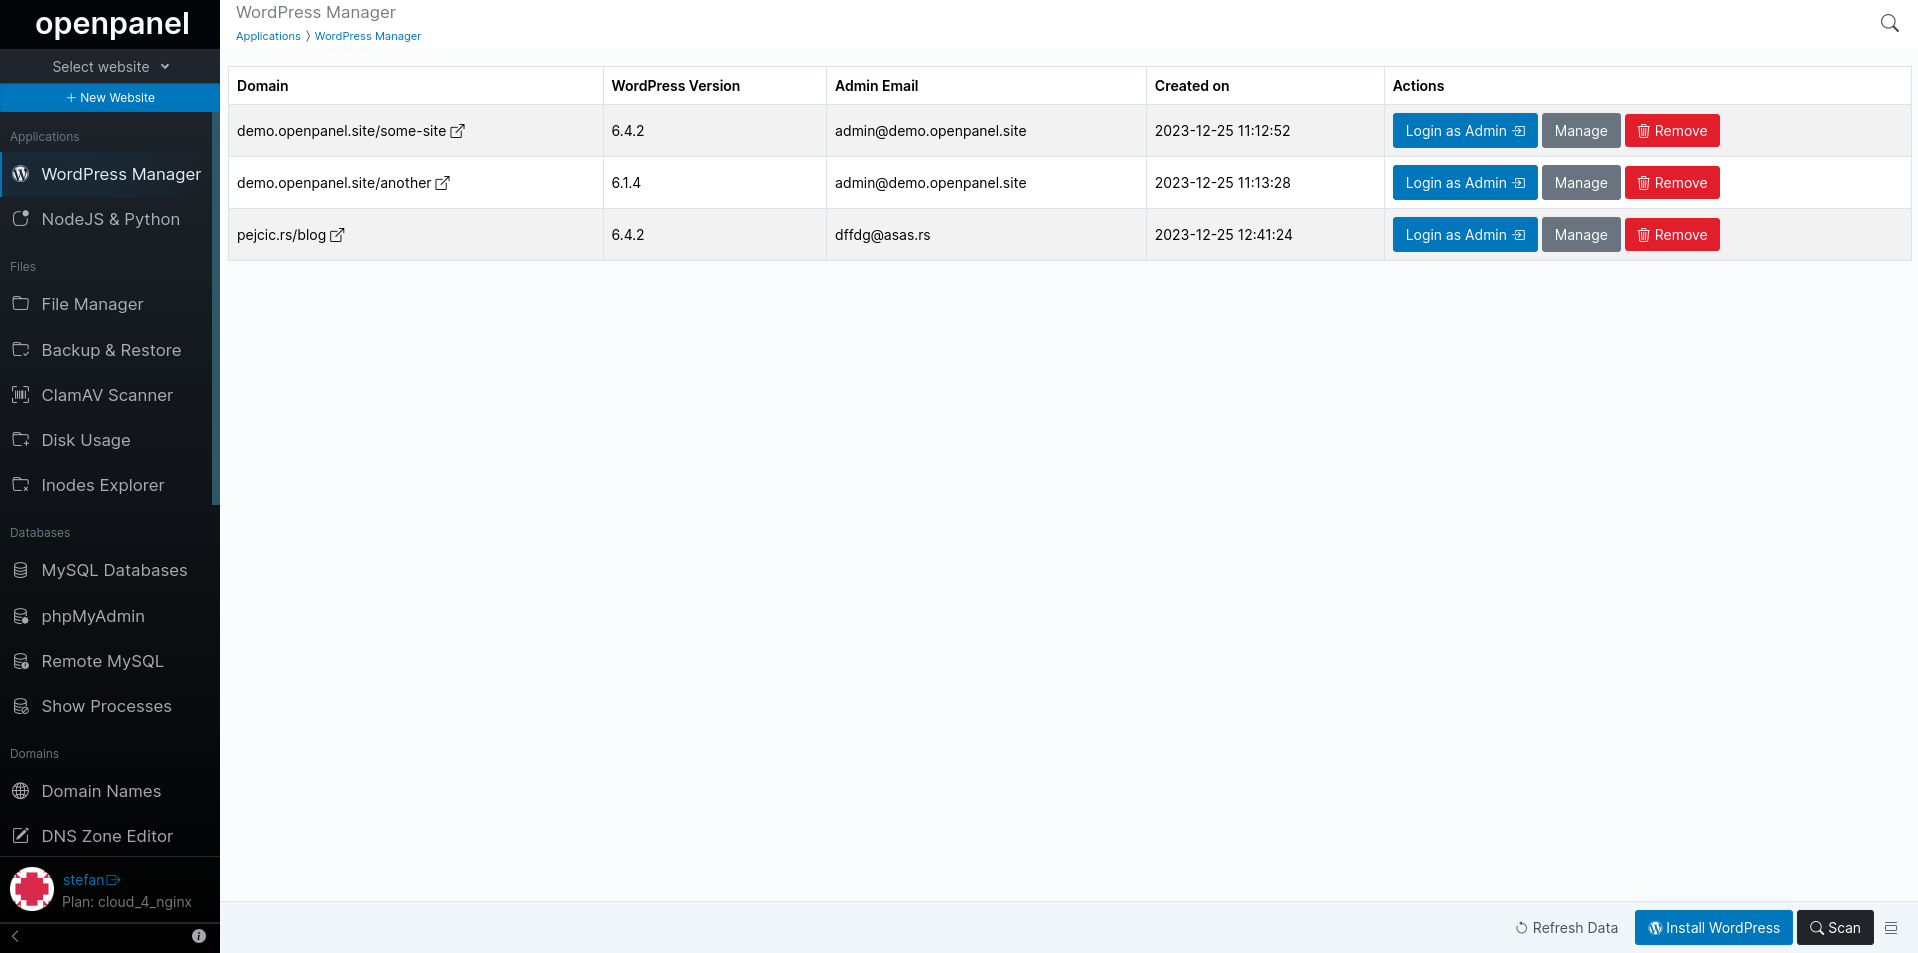
Grid VS Tabular view
Websites can be viewed in grid mode with screenshots or tabular (table) mode.
To change the view to table mode click on the button in bottom right corner of the screen:
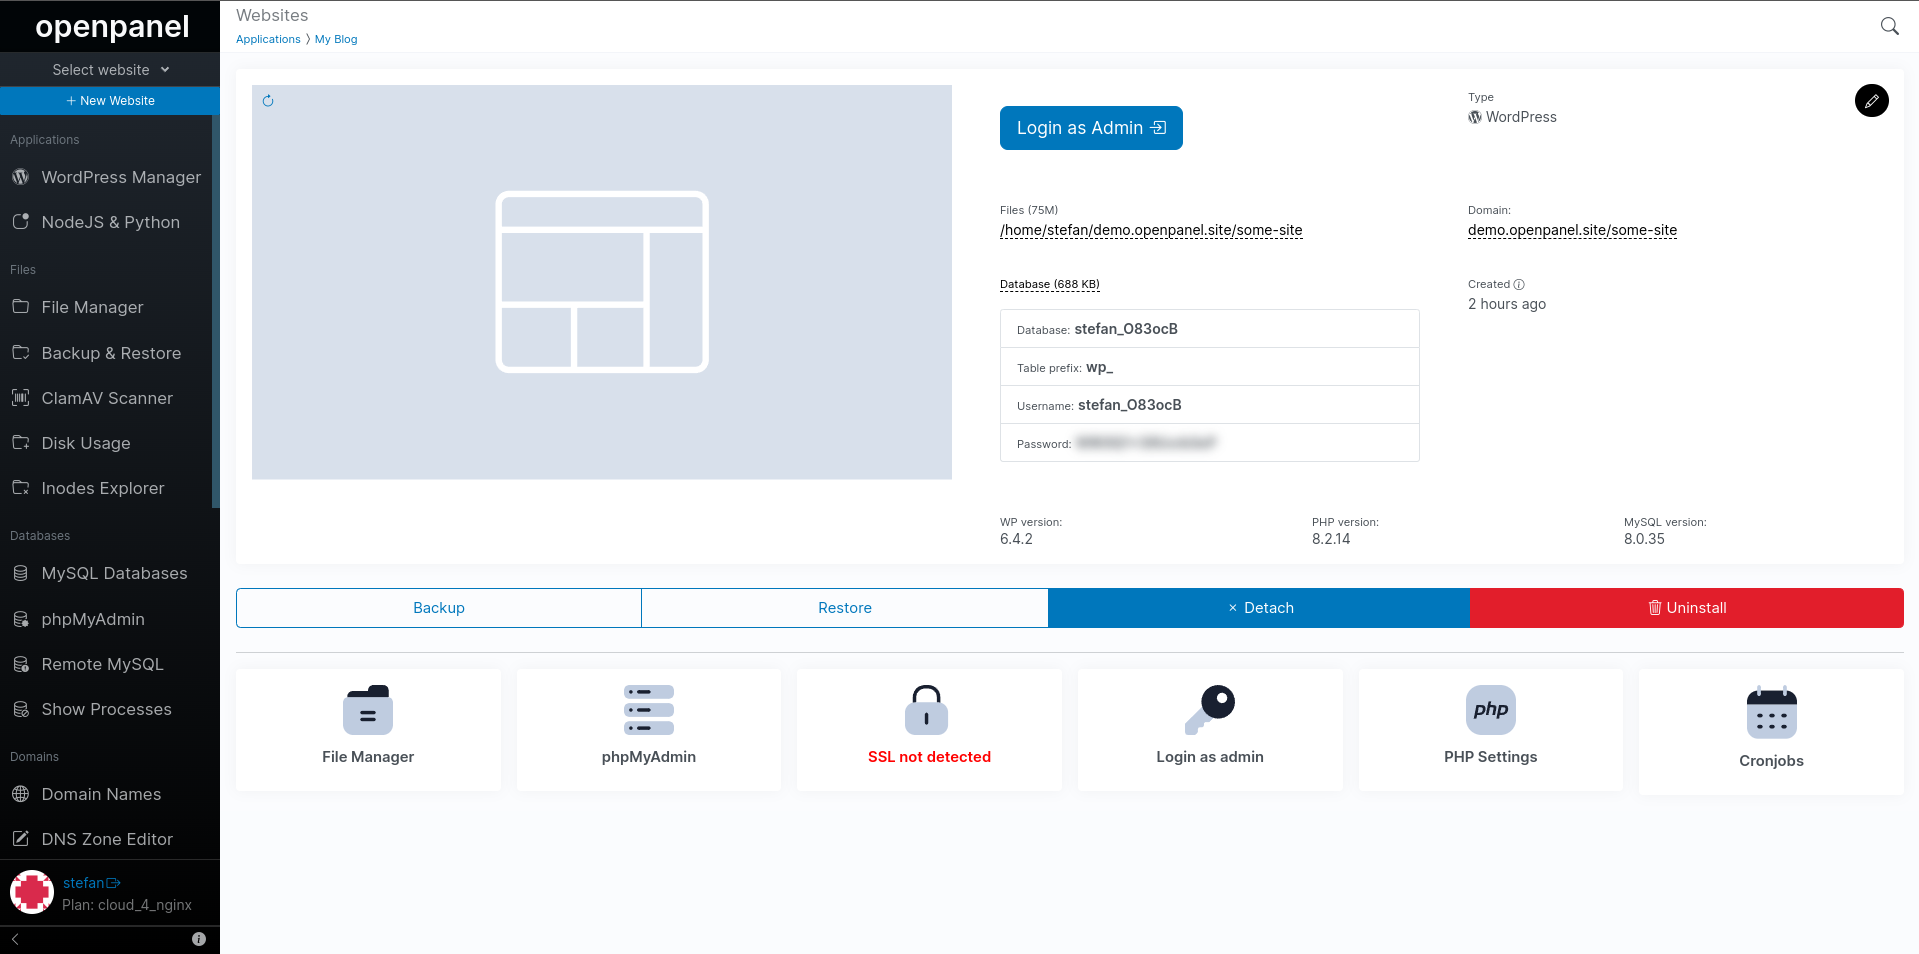
Managing a website

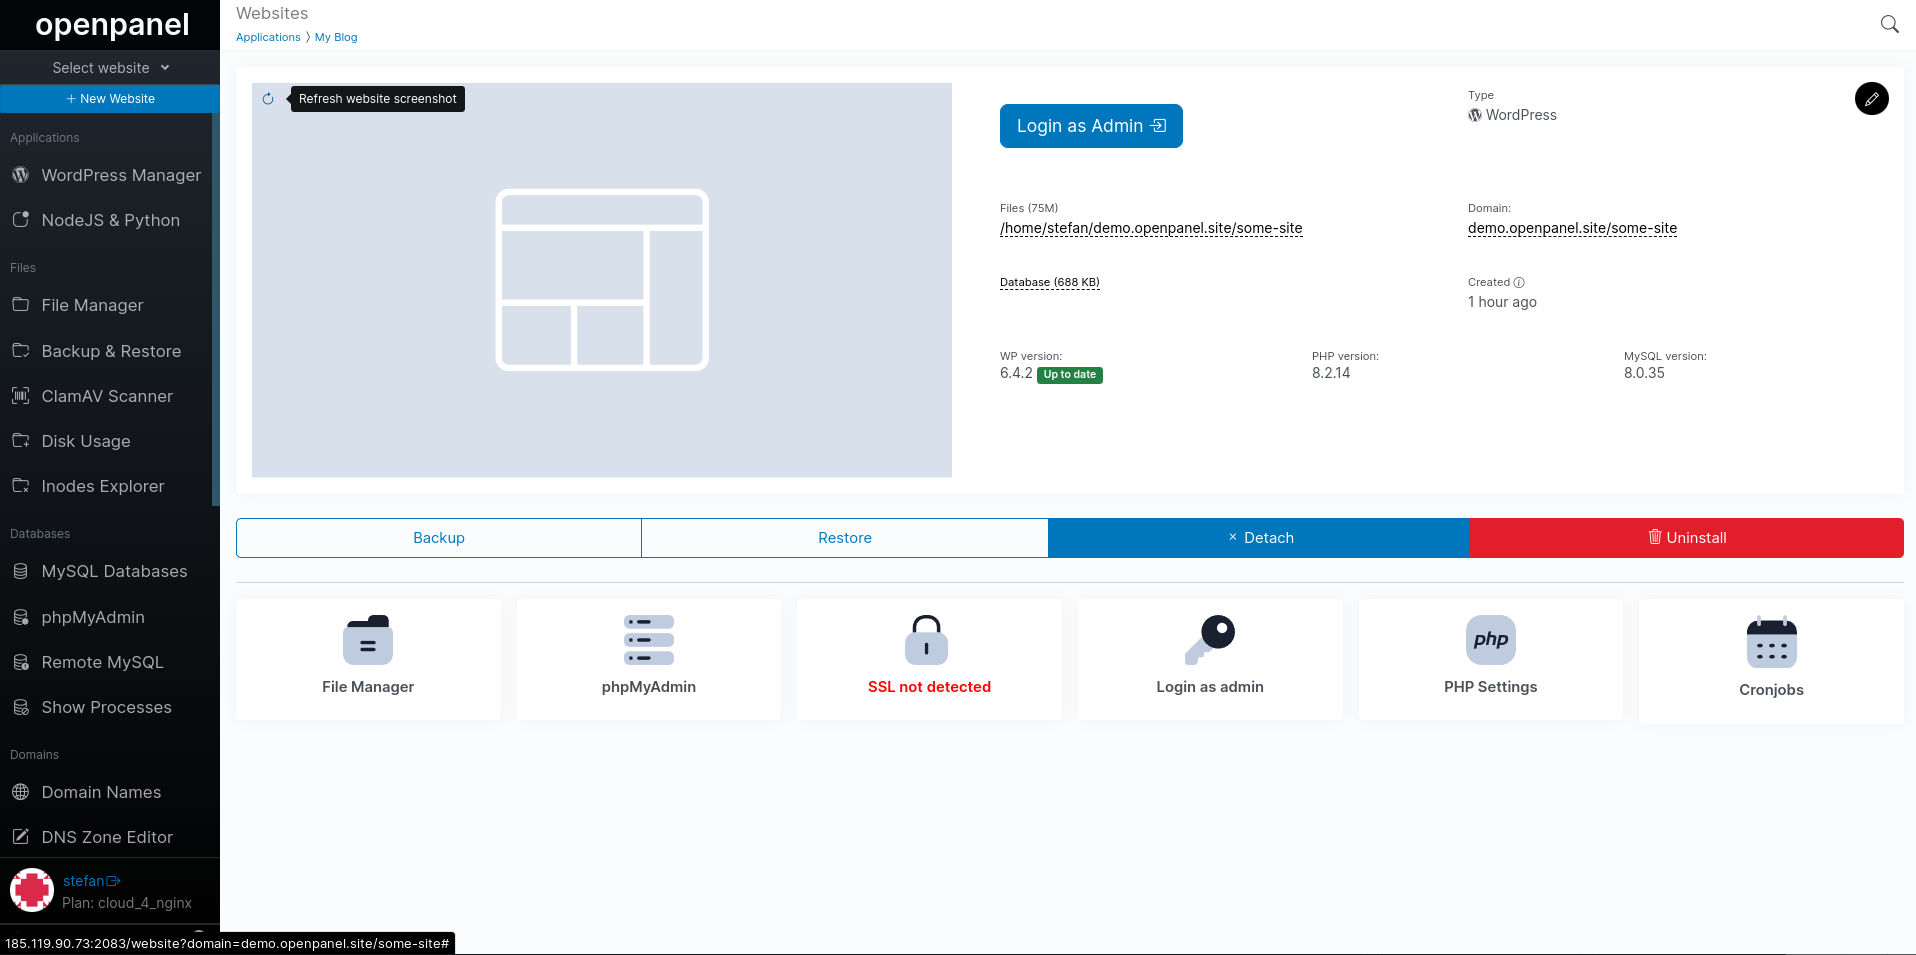
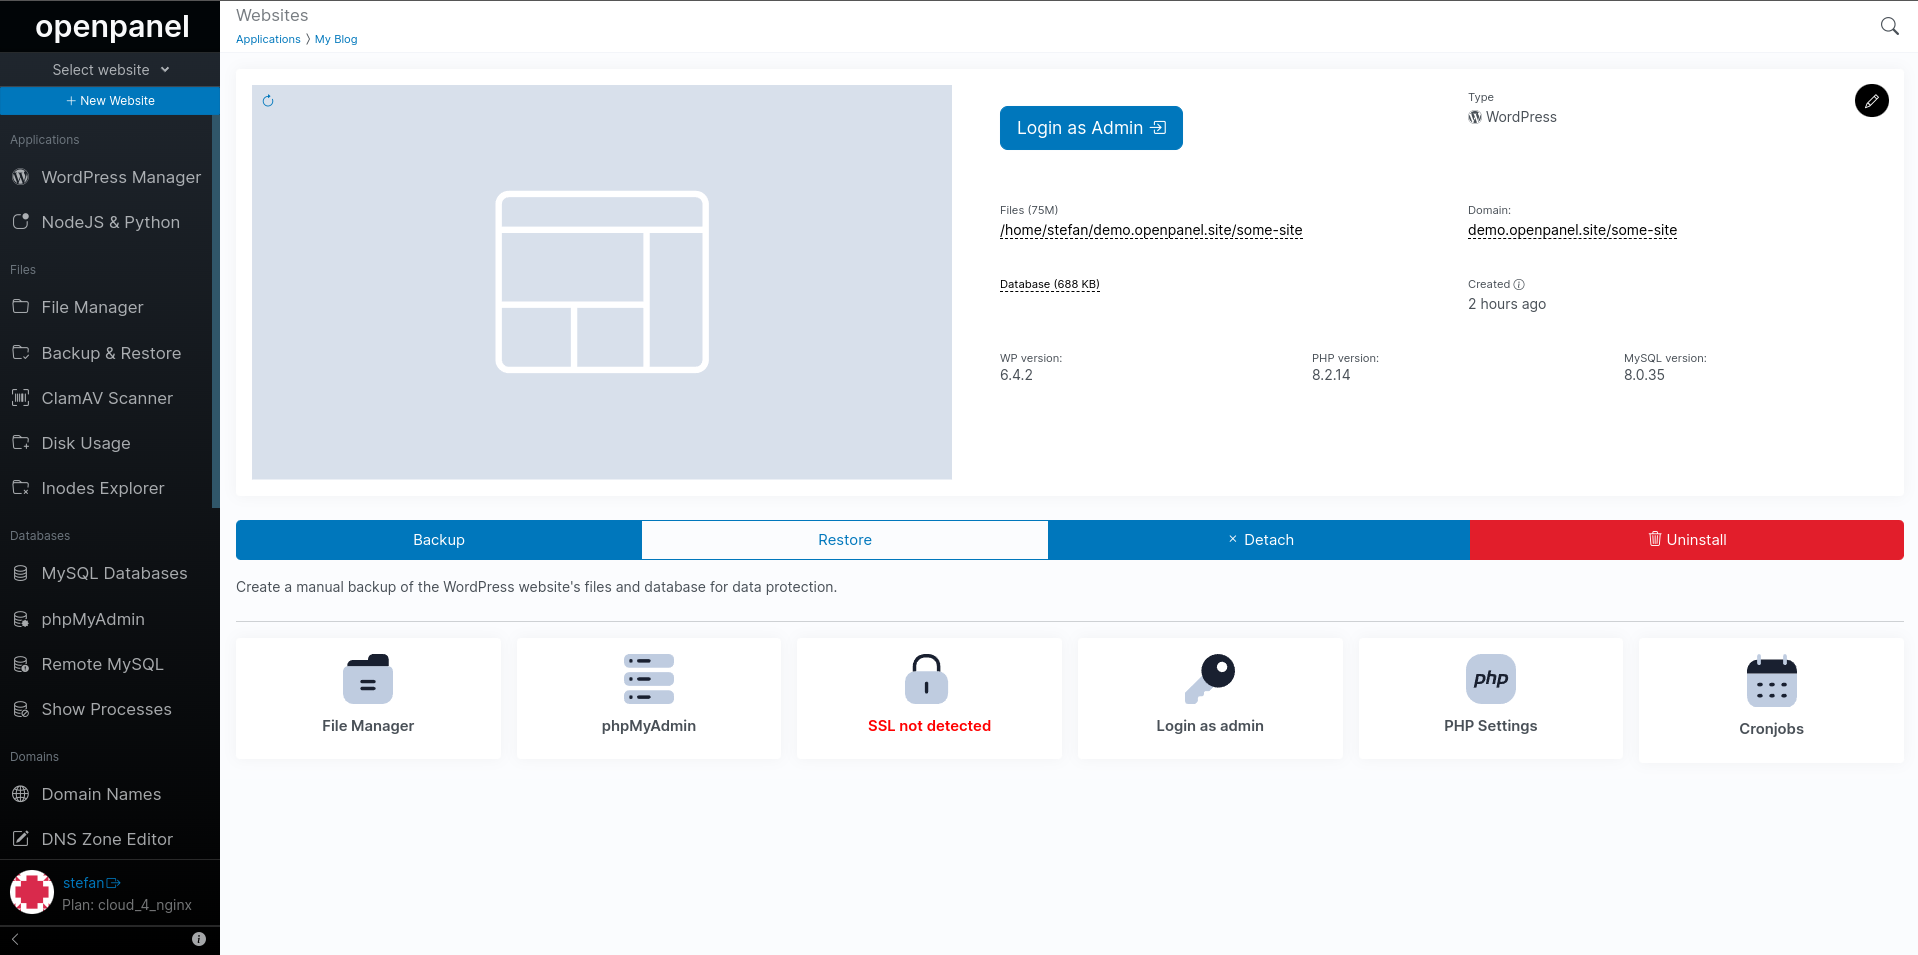
General Information
For each WordPress installation you can view:
- Website name
- Screenshot
- Path to files and total size of the folder
- Database information and total database size
- Domain name
- Date when the installation was added to WP Manager
- WordPress core version
- PHP version used on the domain name
- MySQL version
- Link to phpMyAdmin to view database tables
- SSL status for the domain name
- Link to login to wp-admin
- Link to edit PHP version for the domain
- Link to edit Cronjobs
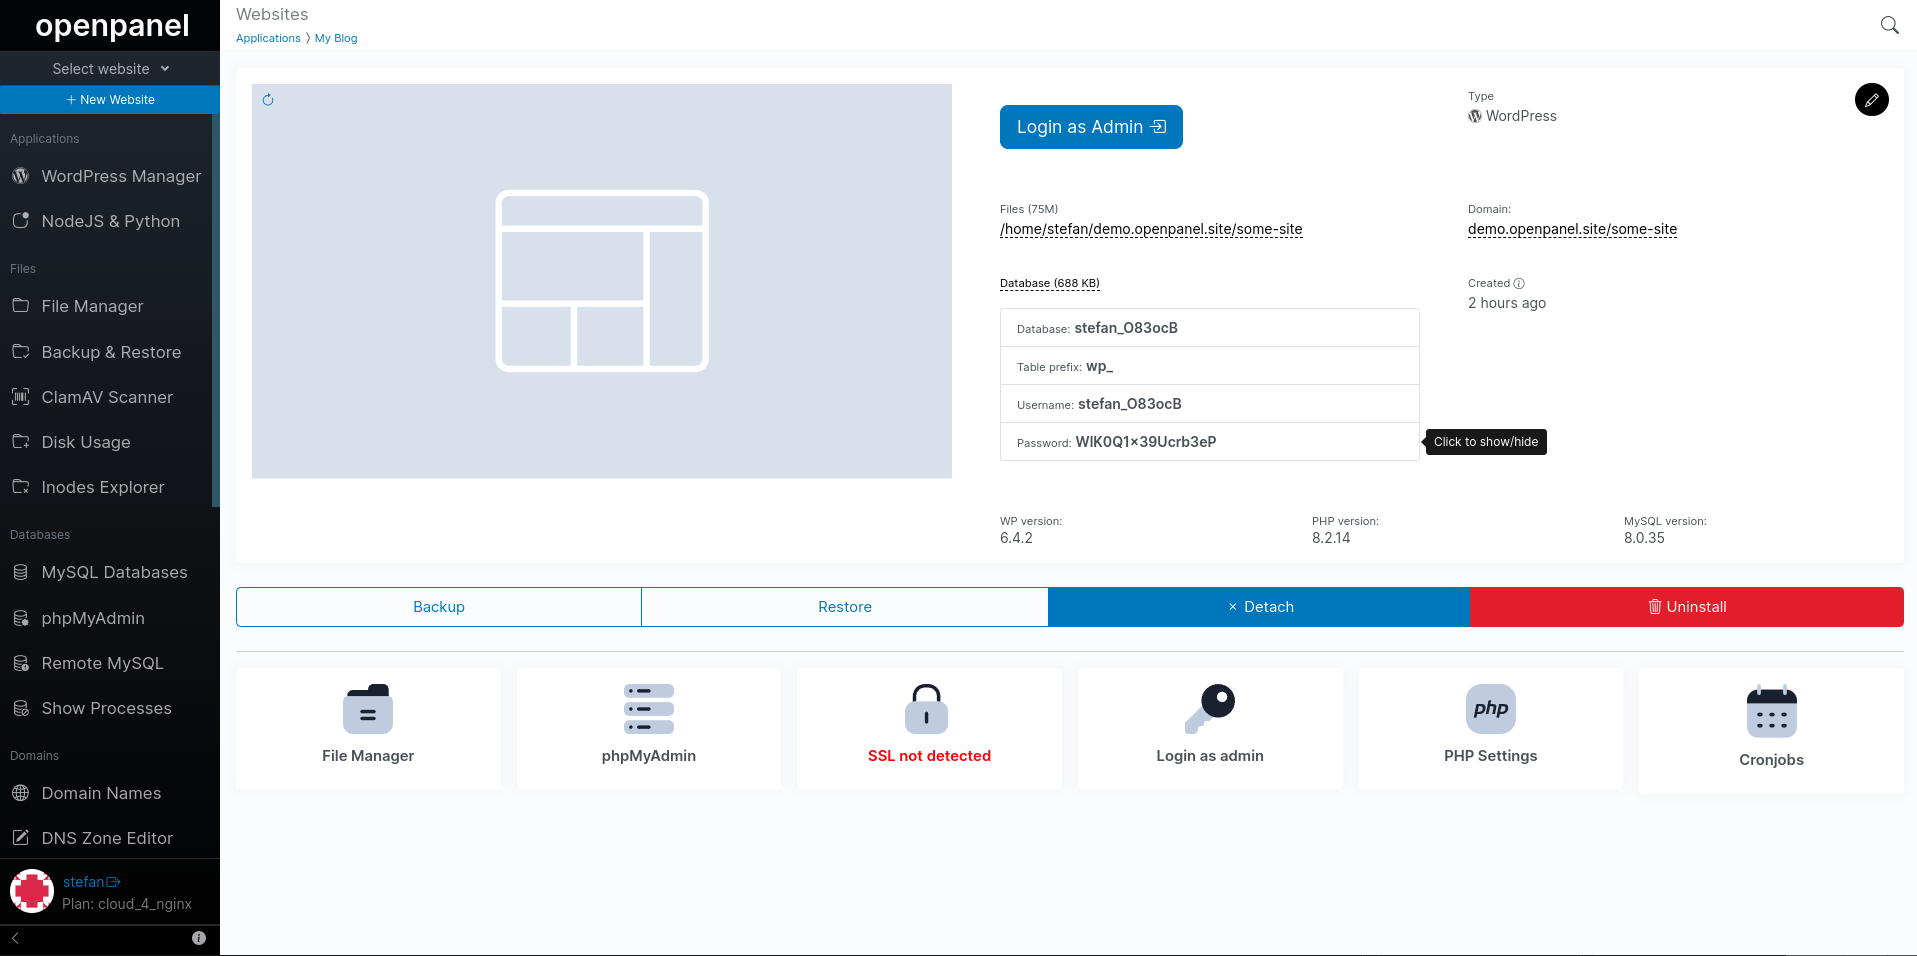
View database information
To view database login information for a WordPress website from the WP Manager click on the Database link:
To reveal the password click on the blured password field:
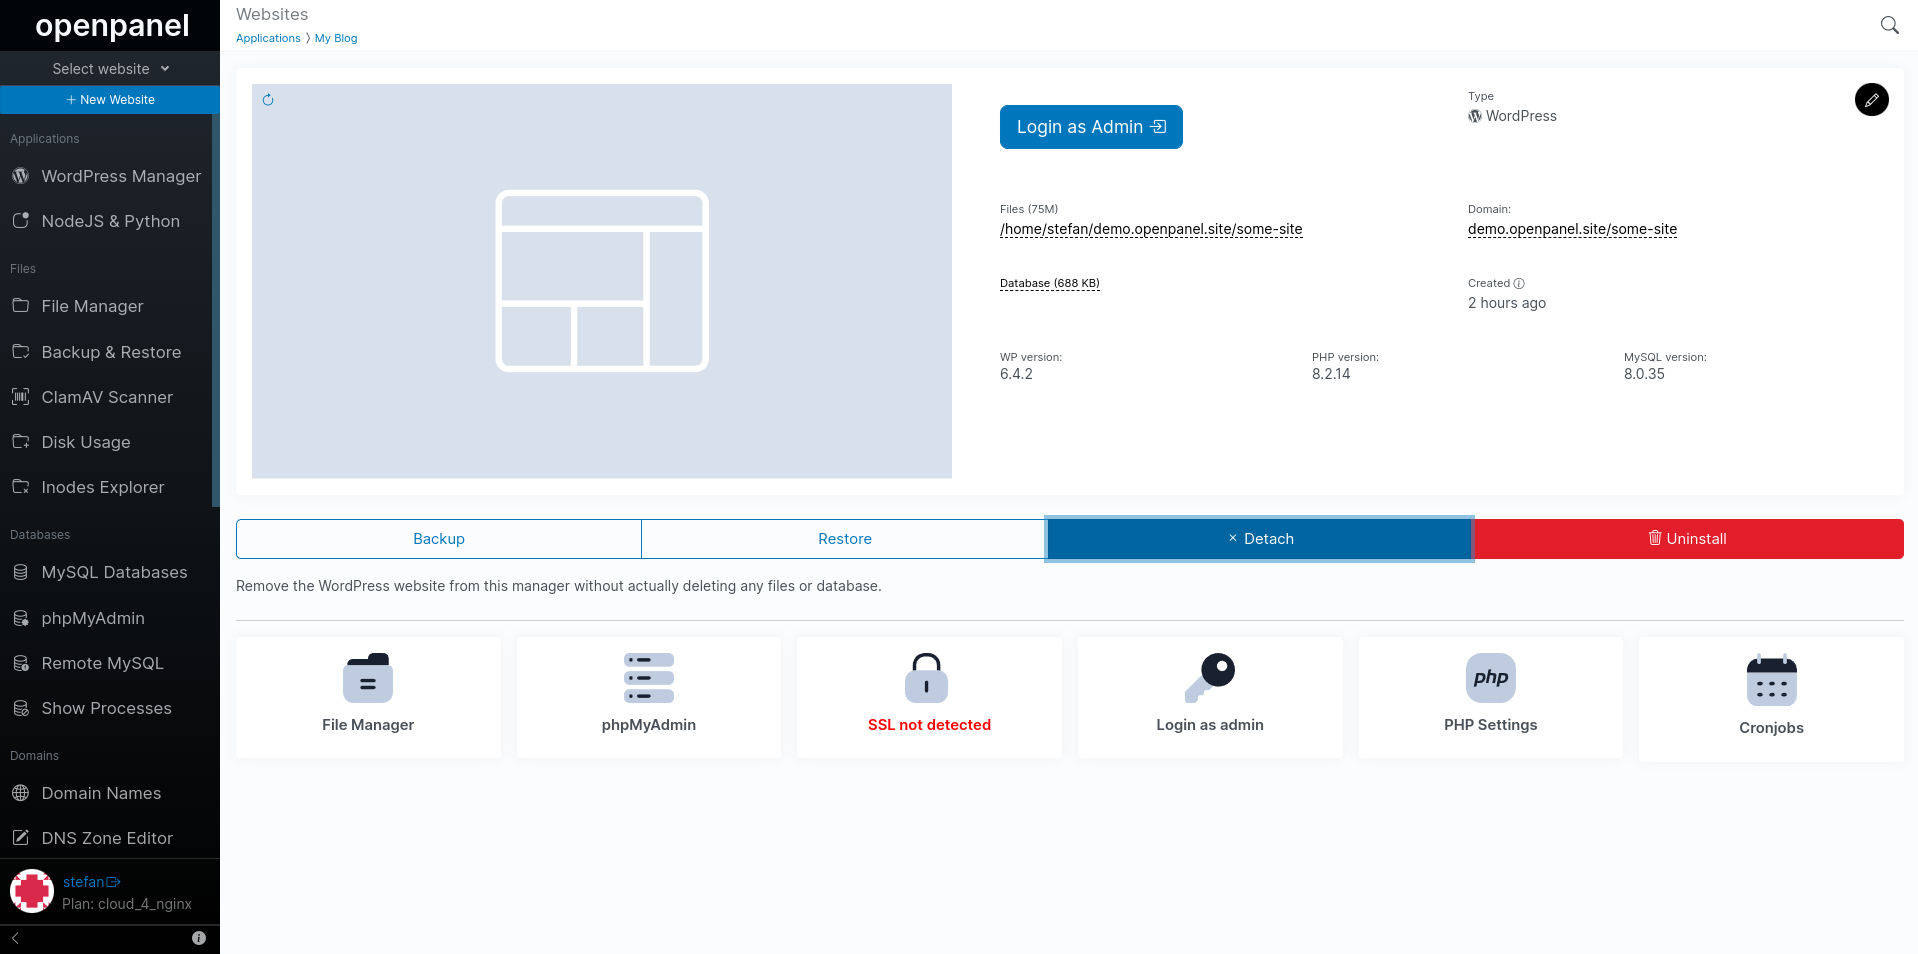
Detach a website
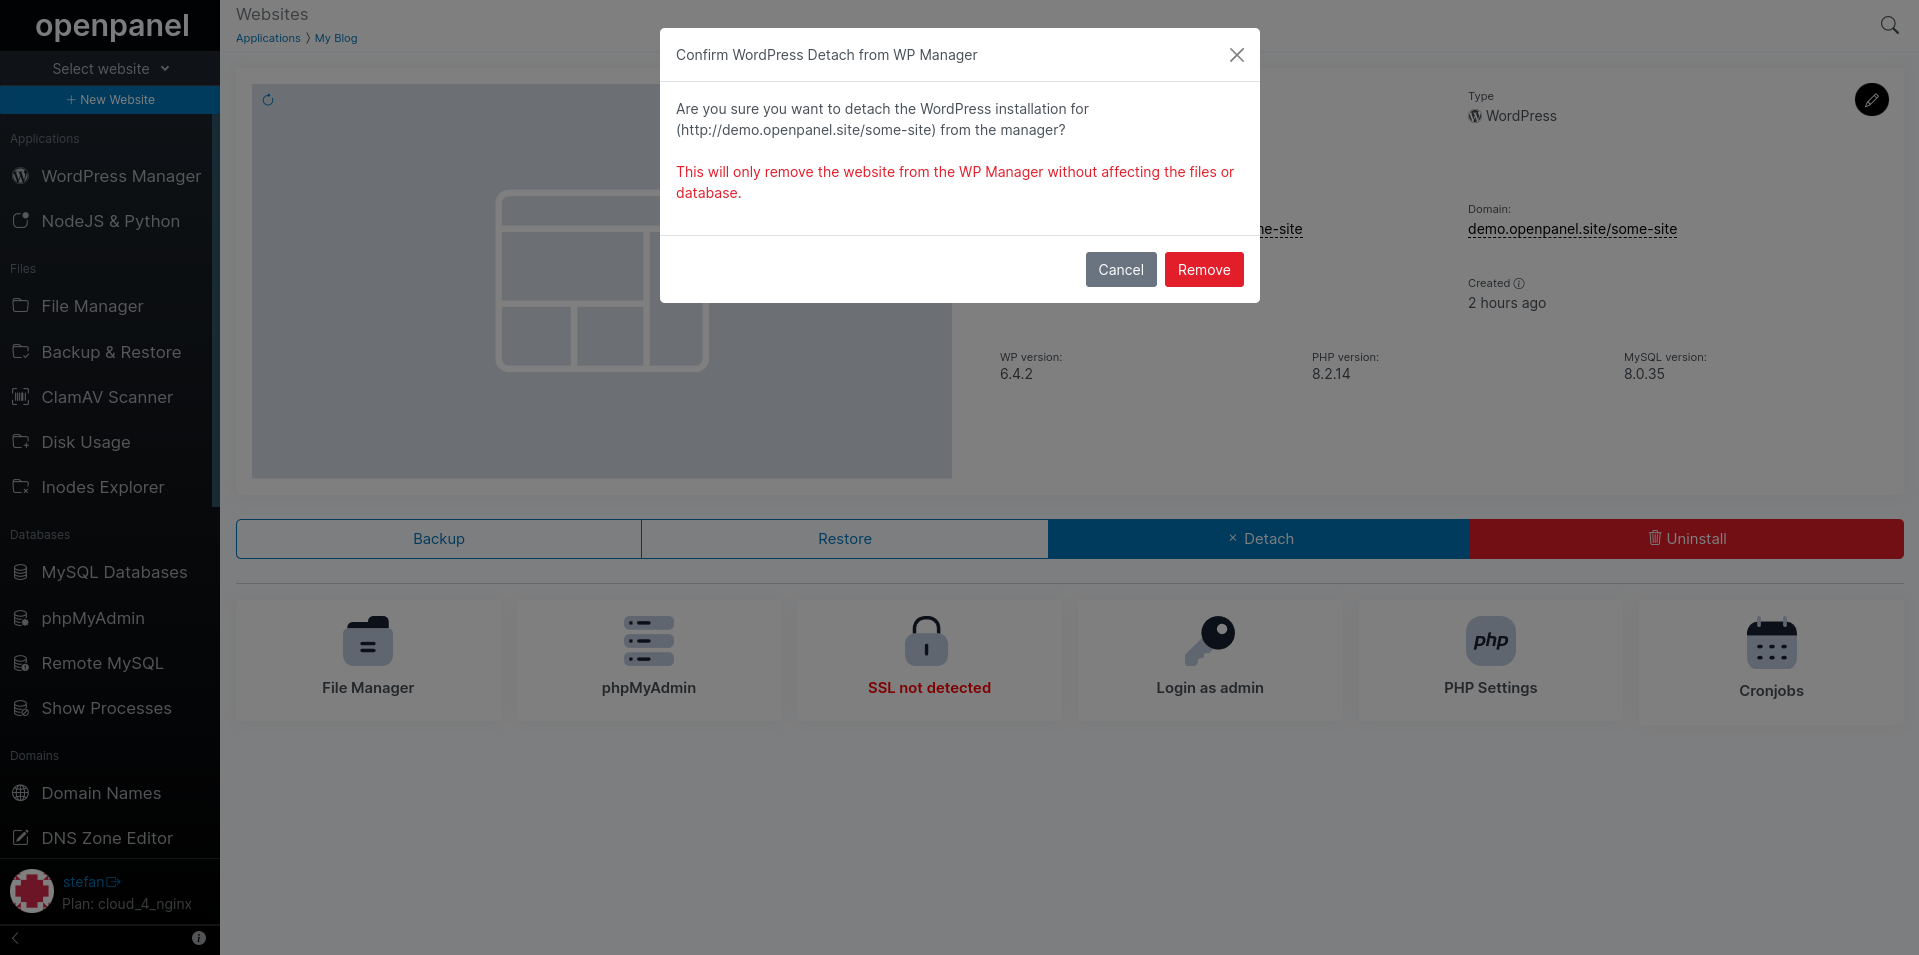
Use the Detach option to remove a WordPress website from the WP Manager interface without actually remove any files or database.
Click on the 'Detach' button:
On the popup click on 'Remove' button to confirm:
Auto Login to wp-admin
Use the single sign-on option to auto login securely to your wp-admin dashboard as the Administrator user.
Click on the 'Login as Admin' button.
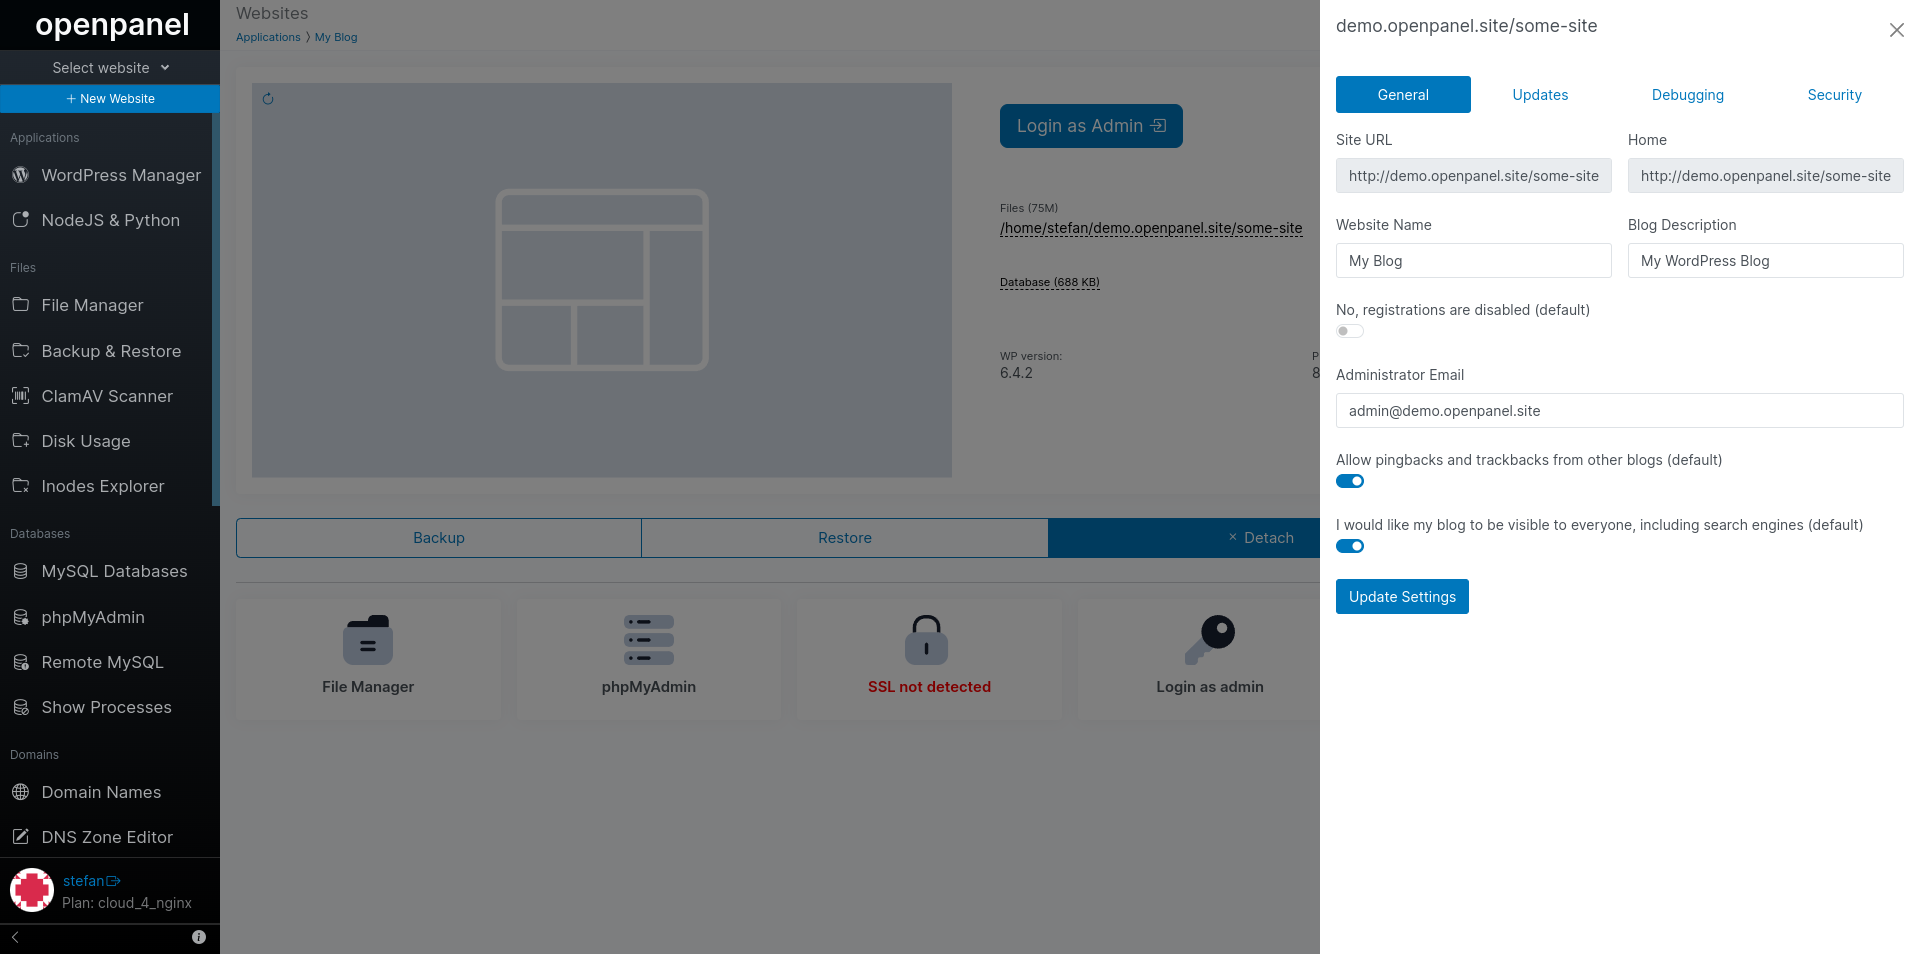
Edit WordPress settings
To edit General, Updates and Debugging preferences for a WordPress website click on the pencil icon in top right corner.
General Settings
General settigns that can be edited for a website:
- Website name
- Blog Description
- Enable/Disable user registrations
- Admin Email that is used for receiving all information
- Allow/Block pingbacks from other websites that mention you
- Block/Allow search engines like Google, Bing, etc.
Update Preferences
Here you can set the update preferences for WordPress core, plugins and themes.
By default only WordPress core updates to minor versions are enabled.
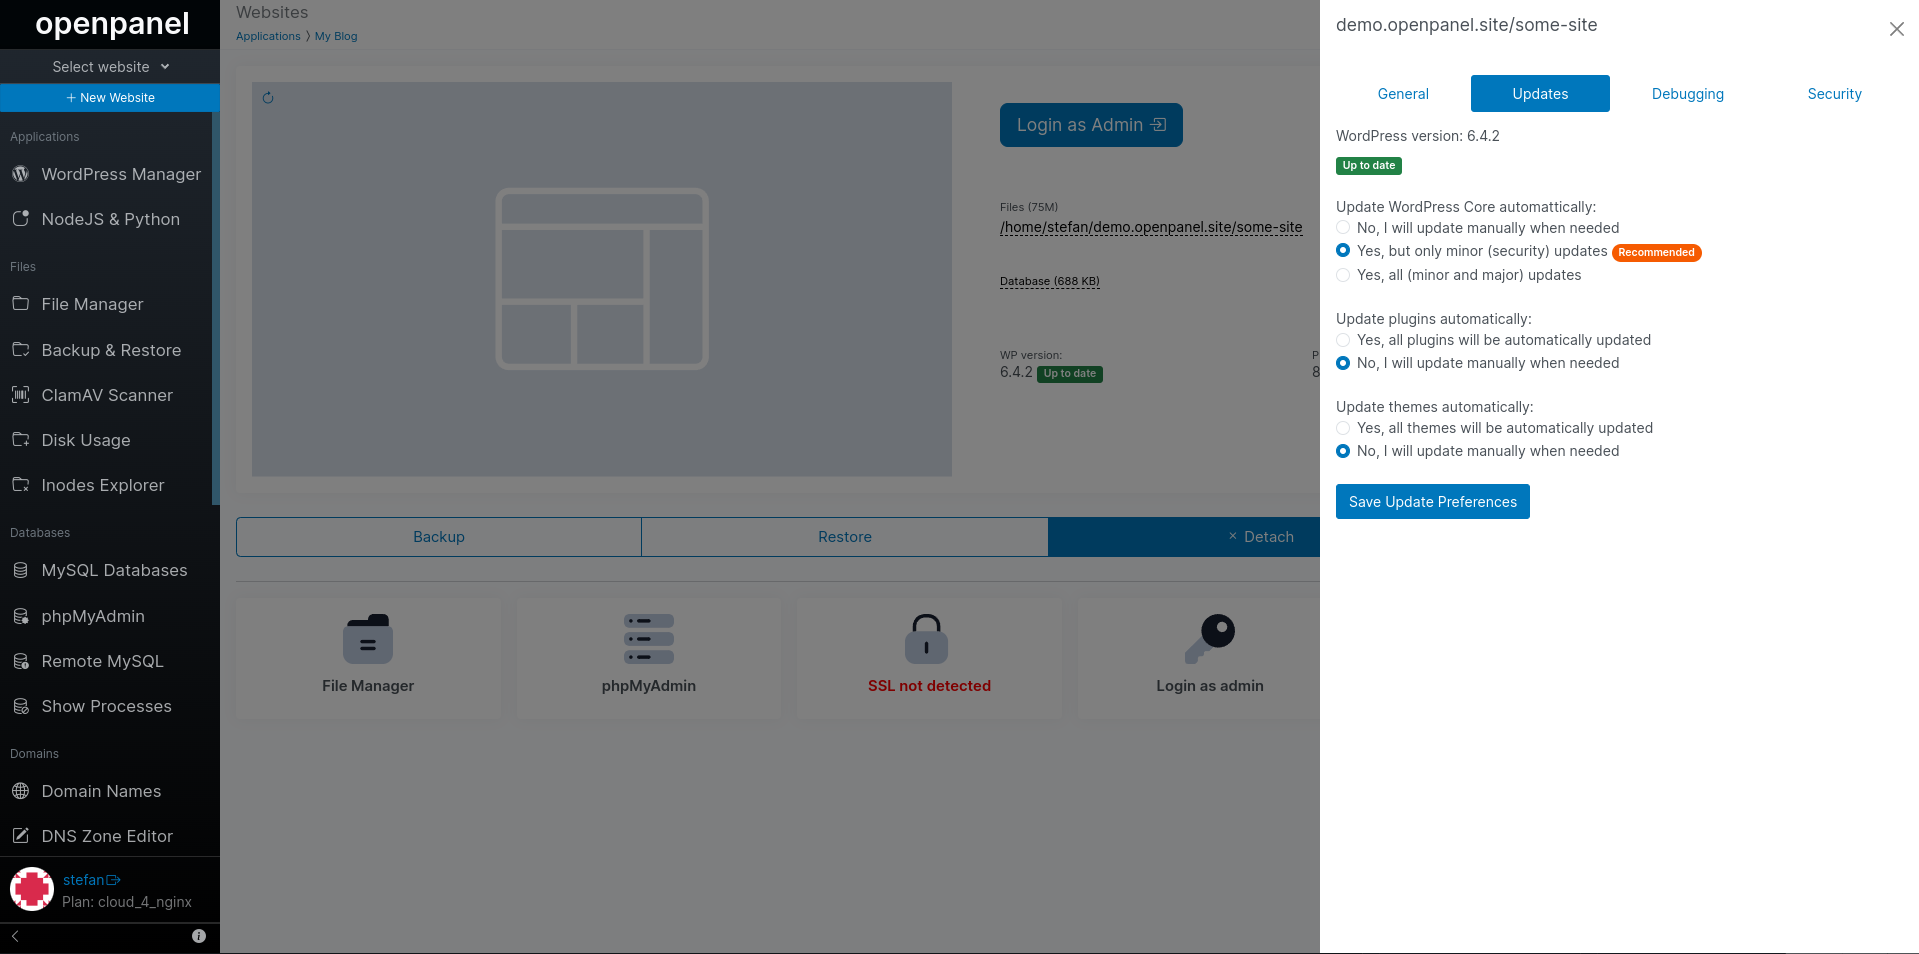
Update WordPress core
If a newer WordPress core version is available, you will see 'Click to update' button which when clicked will perform WordPress update to the newest version available.
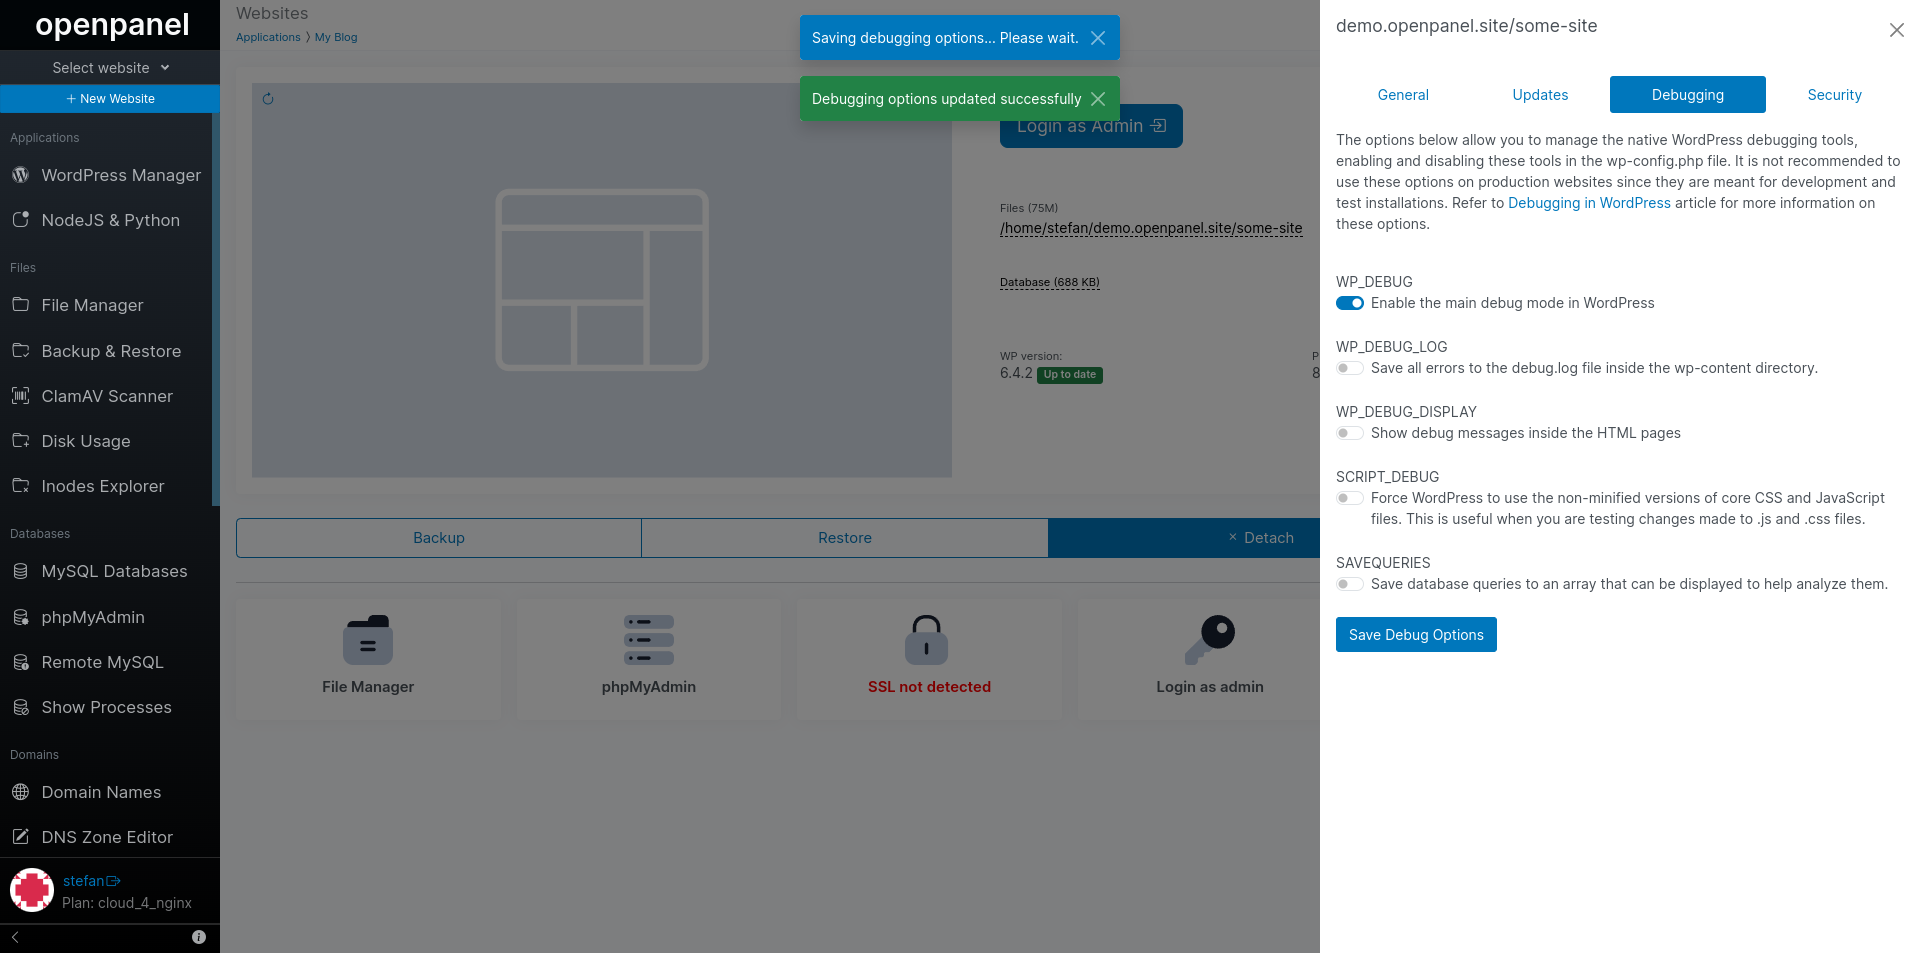
Debug Preferences
These options allow you to manage the native WordPress debugging tools, enabling and disabling these tools in the wp-config.php file. It is not recommended to use these options on production websites since they are meant for development and test installations. Refer to Debugging in WordPress article for more information on these options.
Here you can enable:
- WP_DEBUG
- WP_DEBUG_LOG
- WP_DEBUG_DISPLAY
- SHOW_DEBUG
- SAVEQUERIES
Refresh website screenshot
Website screenshots are periodically re-generated every 24h, if you need to manually refresh the screenshot click on the icon in top left corner of the screenshot.
Uninstall WordPress
To uninstall WordPress and permanently delete all website files and database, click on the 'Uninstall' button.
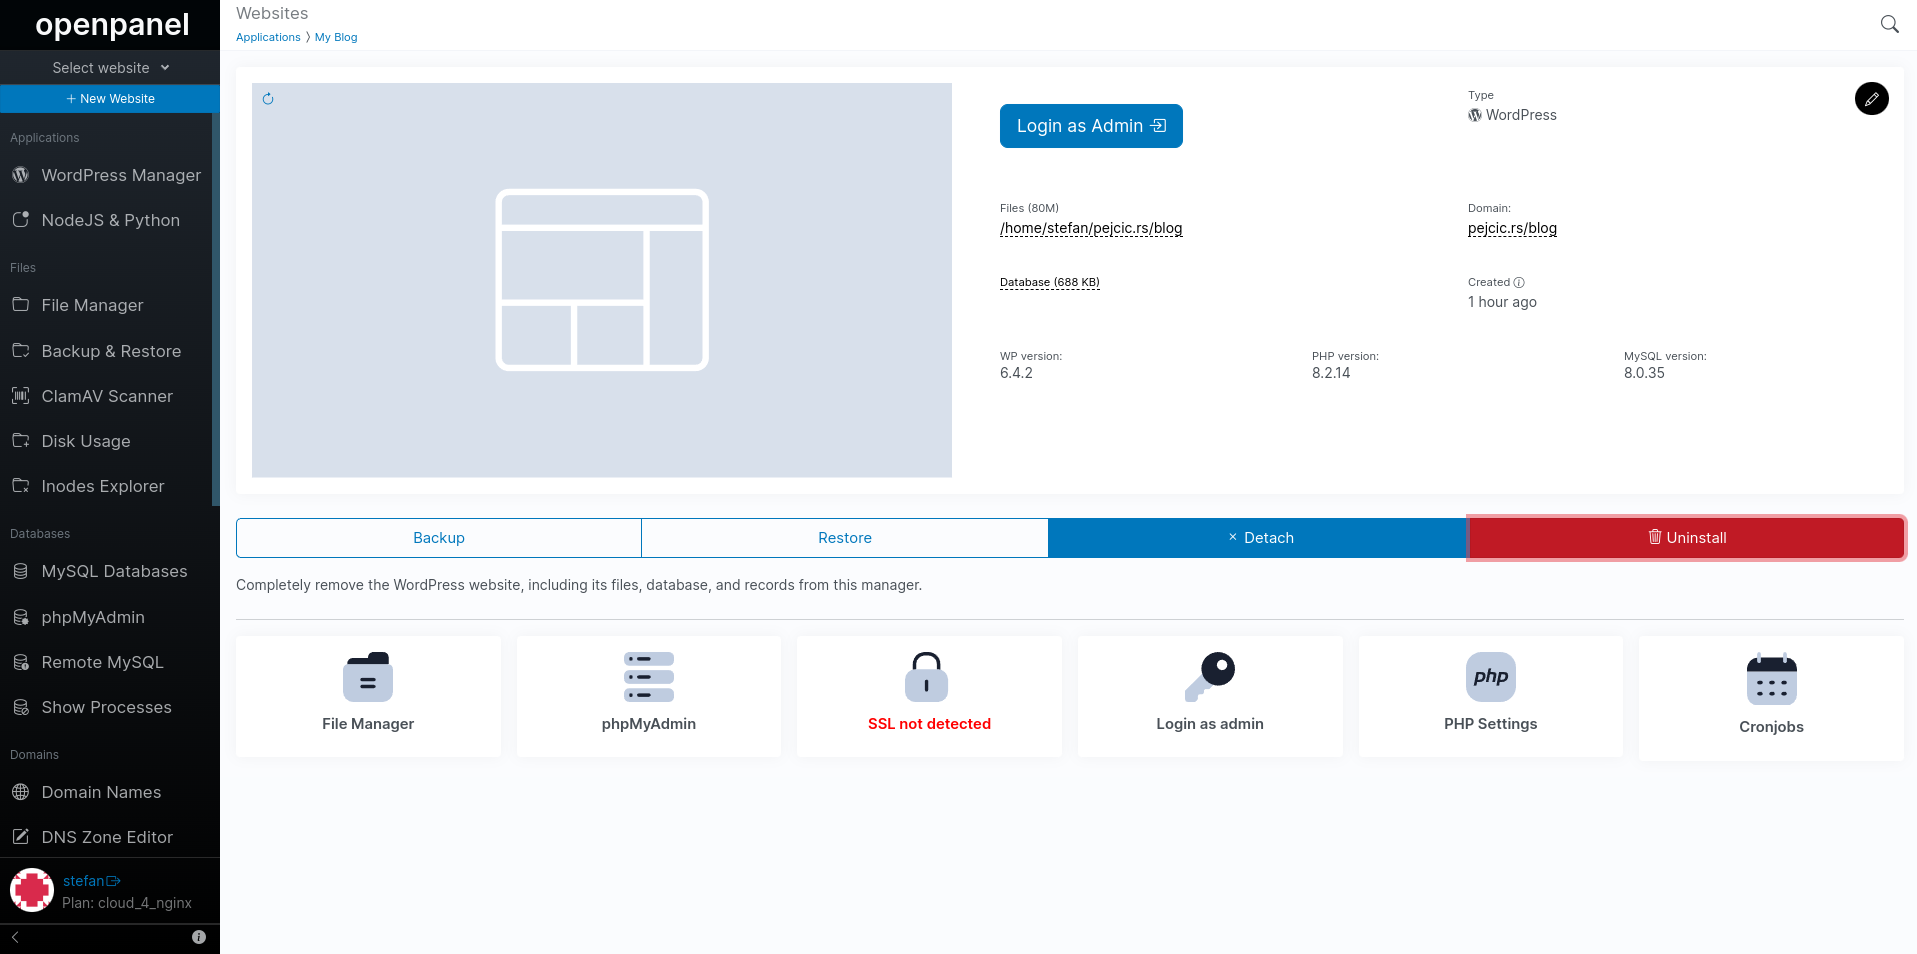
On the modal click on the 'Confirm Uninstall' button to confirm.

Backup and Restore
You have the options to perform manual backups of WordPress files or databases as needed, and easily restore them when required.
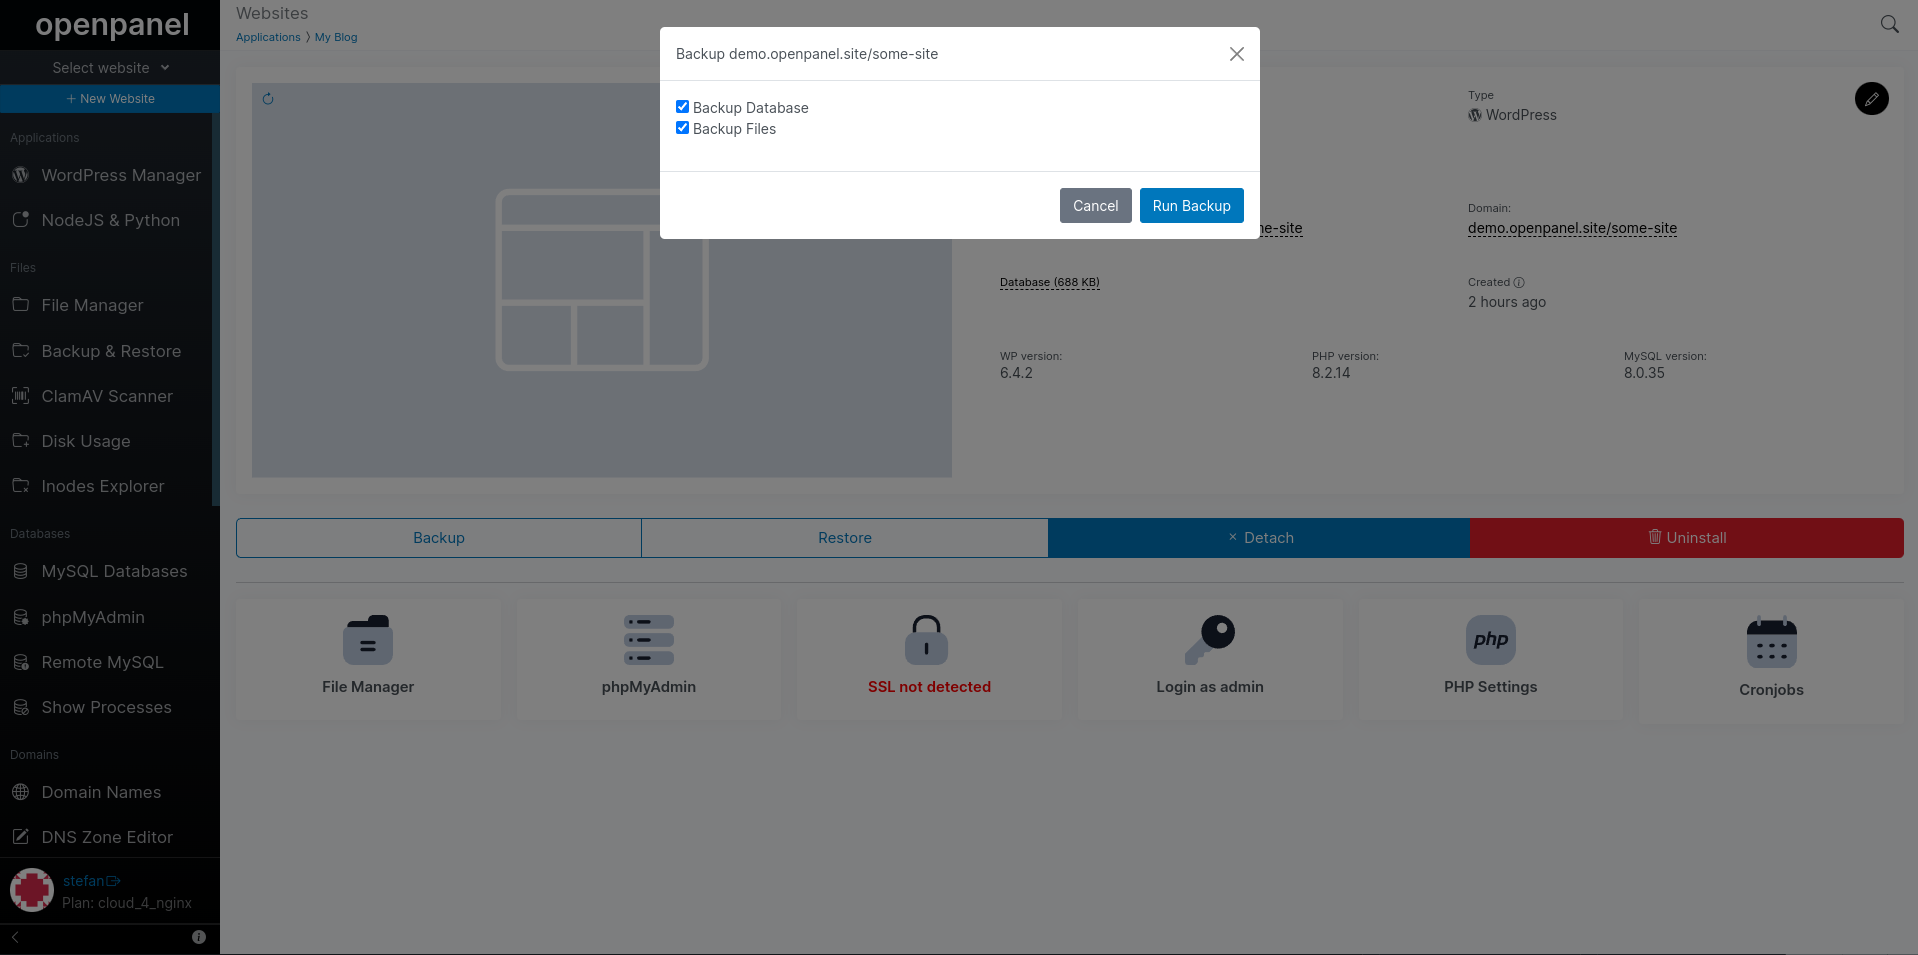
Create a backup
To generate a new backup click on the 'Backup' button.
On the modal select to backup both files and database, just a database or just files. Click on the 'Run Backup' to start the backup process:
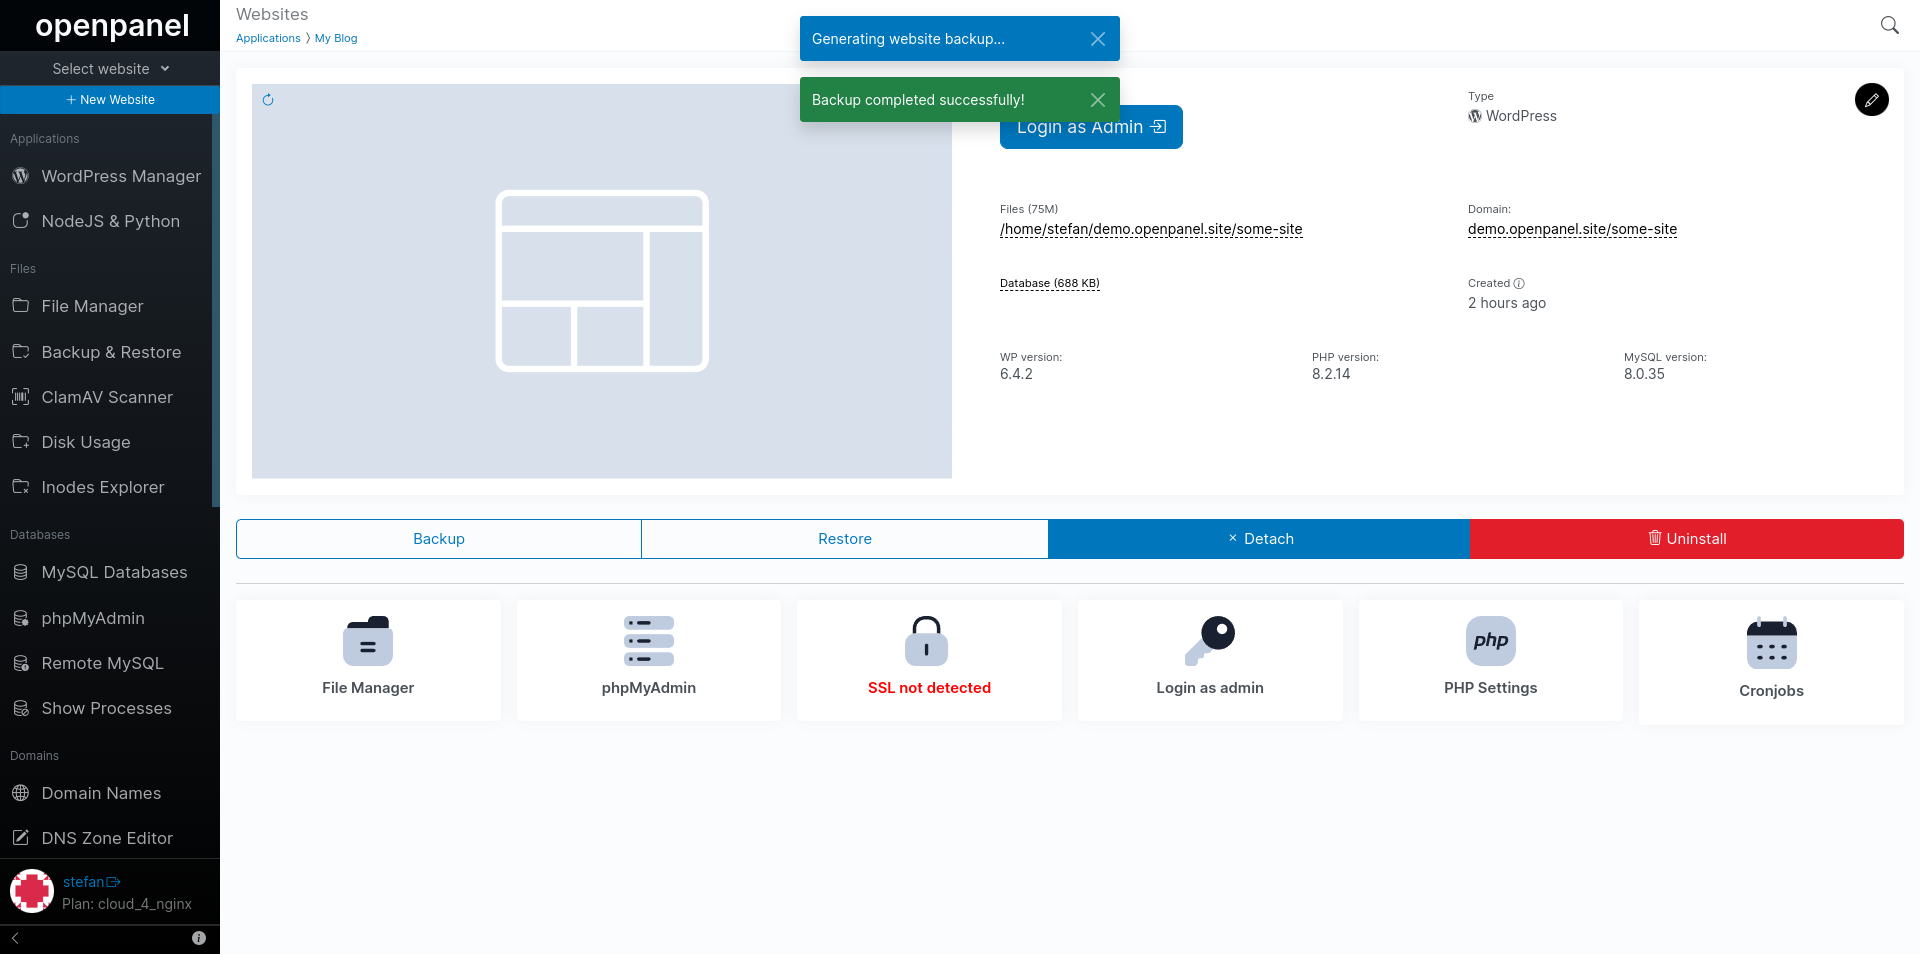
After backup process is finished you will receive a notification.
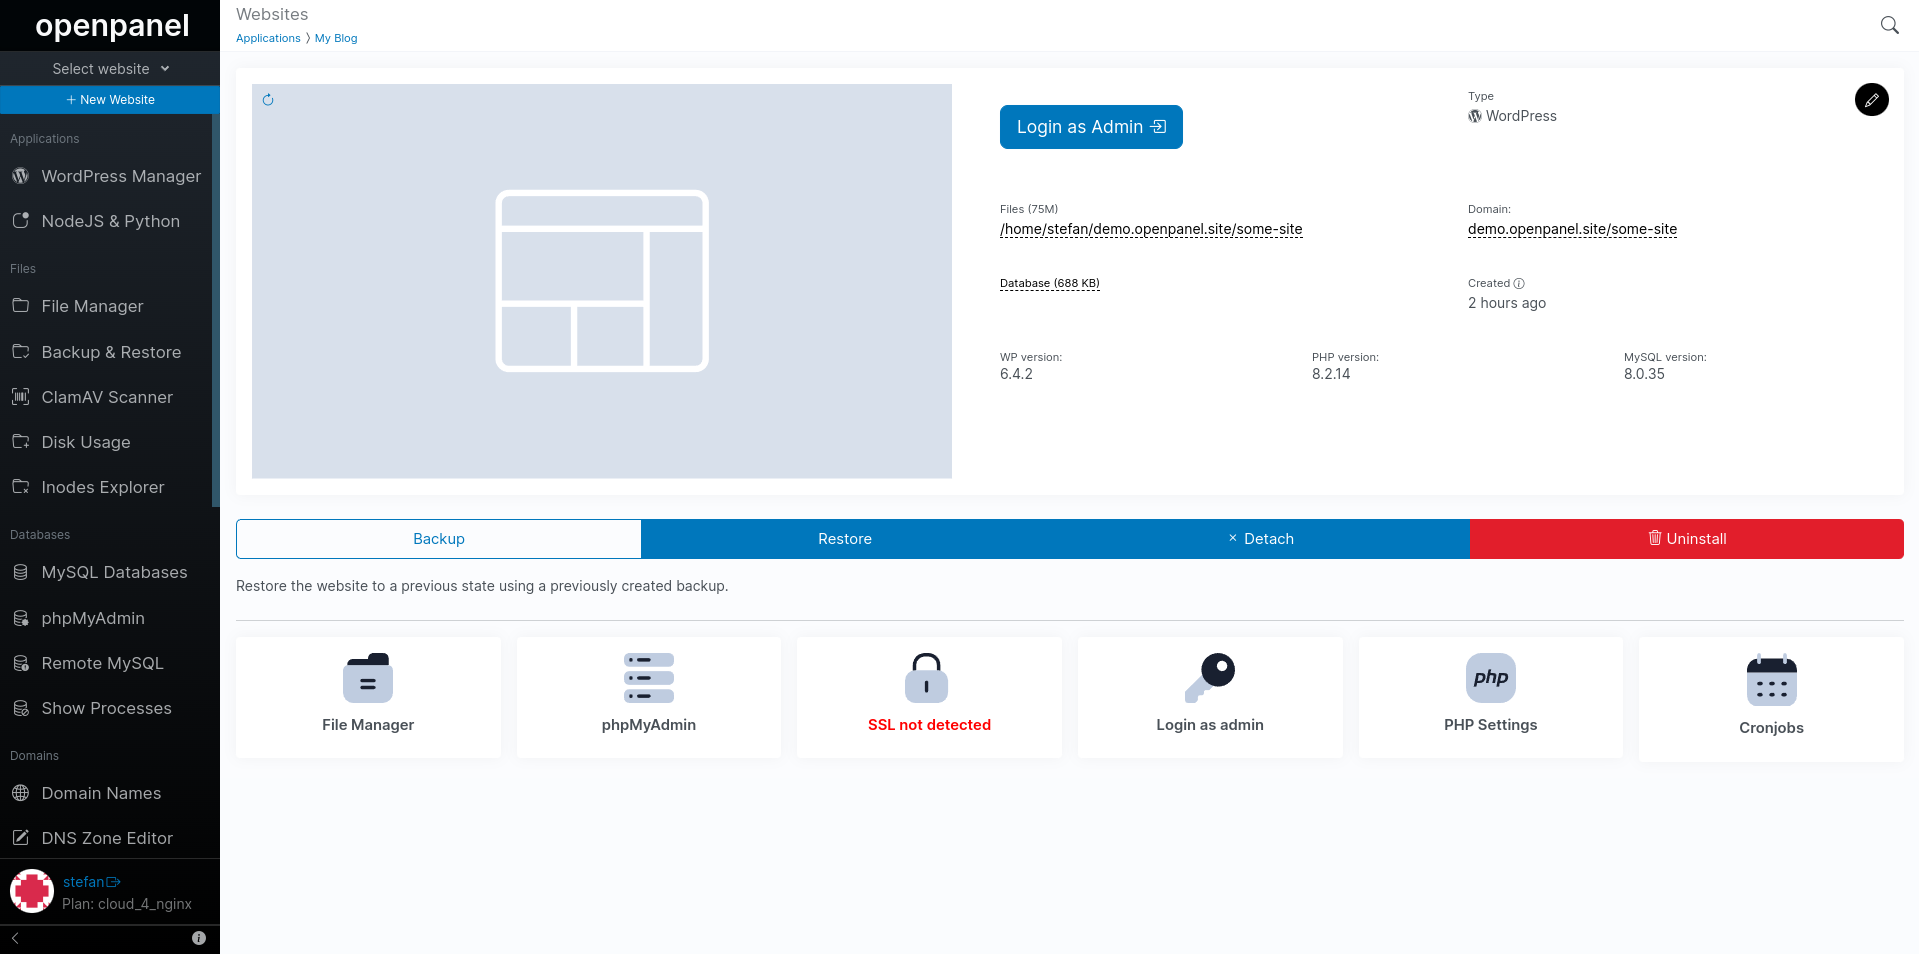
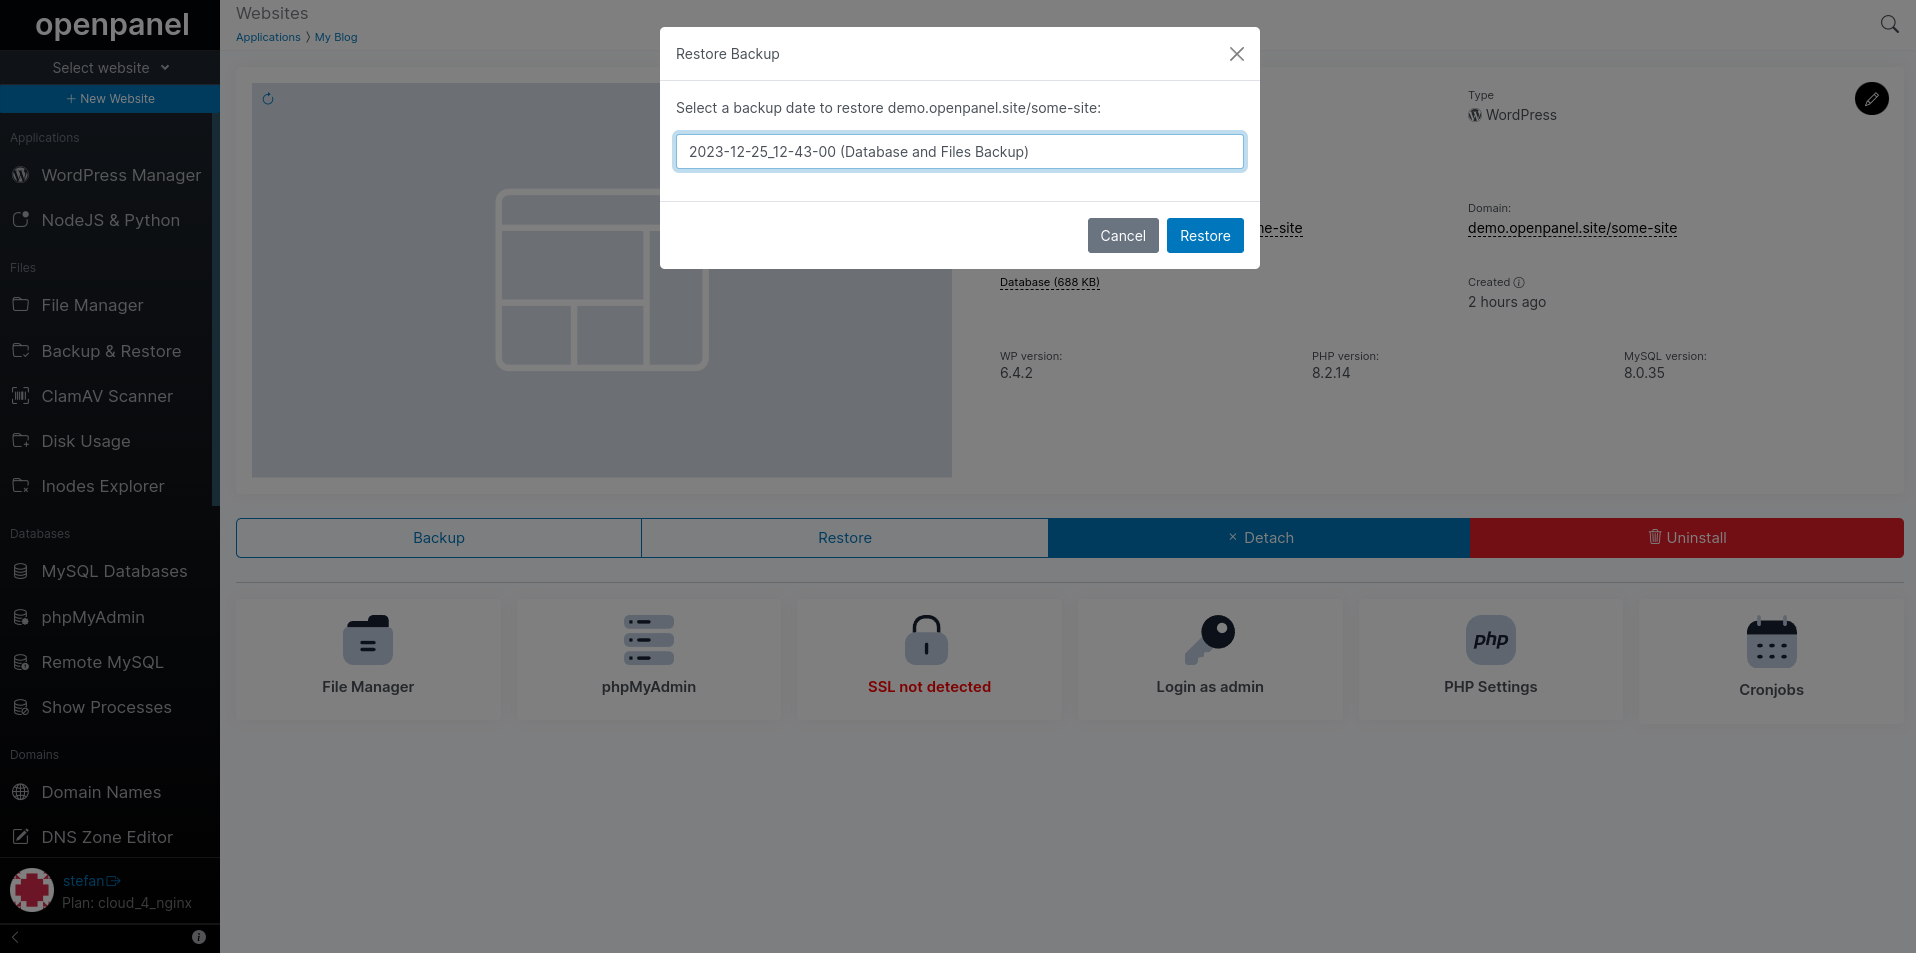
Restore from backup
To restore website from a backup created with OpenPanel WP Manager backup option simply click on the 'Restore' button for that website in WP Manager:
In the modal, select the backup date from which to restore the website. In the brackets next to each date you can view if the backup contains only database, only files or both.
After selecting a date, confirm the restore process by clicking on the 'Confirm Restore (Click Again)' button.
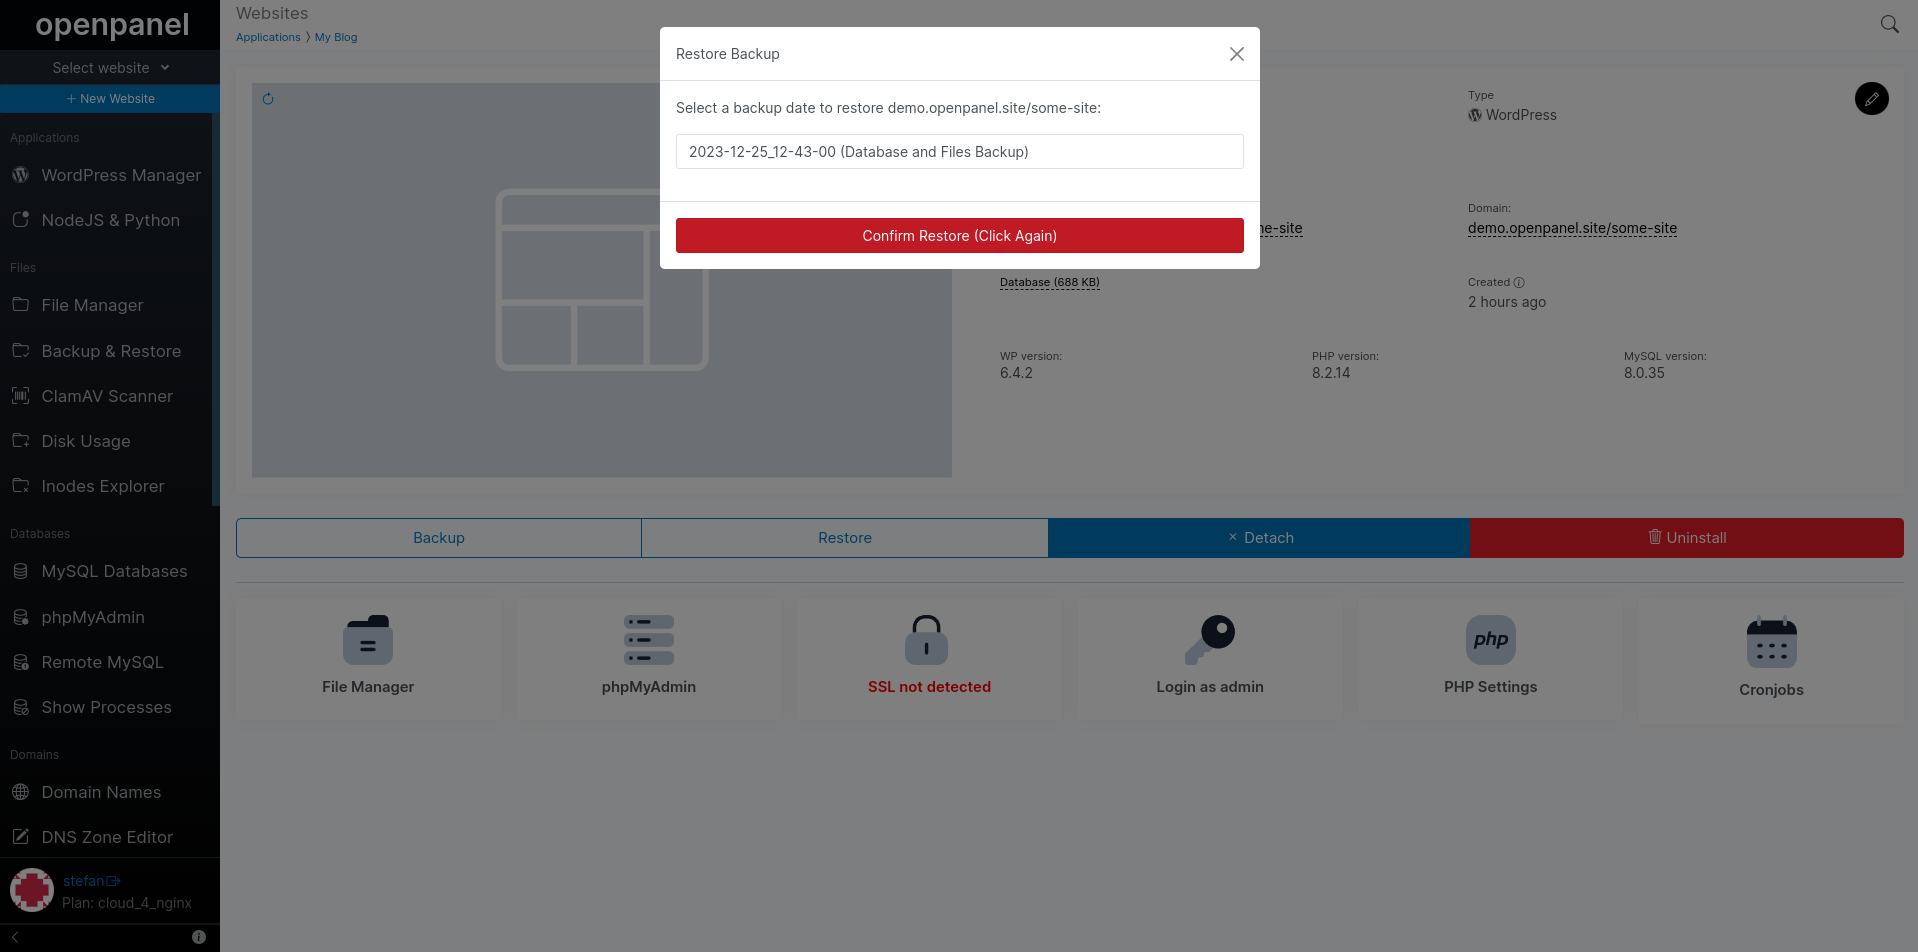
When the restore process is complete you will receive a notification:

- Manage WordPress sites
- WP Manager overview
- Install WordPress
- Scan (Import) Installations
- Refresh existing data
- Grid VS Tabular view
- Managing a website
- General Information
- View database information
- Detach a website
- Auto Login to wp-admin
- Edit WordPress settings
- General Settings
- Update Preferences
- Update WordPress core
- Debug Preferences
- Refresh website screenshot
- Uninstall WordPress
- Backup and Restore
- Create a backup
- Restore from backup